Work Item Command Line 5.0

I just published the Work Item Command Line (WCL) version 5.0. In this post, I will provide a short summary of the changes that went in.

Download and License

The work item command line is provided as is, with no warranty or support, under MIT license. The source code is provided here.

In addition to the source code I usually create releases that contain a zip file with WCL pre built and ready to use. Please note that some of the commands require additional libraries that are not packaged due to license concerns. Read the readme file contained in the WCL folder for how to get the libraries. This is the WCL 5.0 release.

Compatibility

Please note that the current WCL 5.0 is built and tested for RTC 6.0.x. It should be possible to use WCL against older versions of RTC, but that requires some modifications to deal with some small API and packaging changes for RTC 6.0.x. Please see this post for some information about what needs to be done.

Changes

The changes between WCL 4.3 and WCL 5.0 are as follows.

  • A new command -bulkupdate has been added that allows to perform an update for all work items returned by a query. All qualified work items will be updated with the values provided. The values can be provided with the same syntax used in the command -update.
  • It is now possible to delete all attachments of a work item. Use the pseudo attribute @deleteAttachments with required value “yes“.
  • It is now possible to delete all links of a linktype from a work item. Use the pseudo attribute @deleteLinks_linktype with required value “yes“.
  • Timestamps/Date values can now be set to unassigned.
  • WCL registers itself as potentially resource intensive scenario. This information is available in the RTC server as MBean and can be queried and displayed.
  • Work item resolution values are now correctly exported as display value and not as resolution ID.
  • Work item resolution values are now correctly imported. WCL detects the value to set for a resolution from the display name and the ID.
  • The command -importworkitems now handles empty column values for the attributes where it makes sense. An empty column value will overwrite an attribute value and remove it. In previous versions the import ignored empty values. Not all attributes can be set to an empty value. Categories, for example, have to always be set using a category value. Use the switch /ignoreemptycolumnvalues to switch back to the old behavior ignoring empty columns.
  • The command -importworkitems does no longer attempt to write attributes that can not be set and only displays a warning. Examples are the creator, the creation date and other values managed by RTC.
  • The command -importworkitems handles some new pseudo attributes such as e-signature gracefully by warning that they are not supported.
  • The export and print work item commands order the column output alphabetically if no special column order is specified.
  • Minor bug fixes.

Changes are also mentioned in the releases.

Summary

WCL has come to a point where it does pretty much all I wanted it to do in the inception phase. I hope it helps users out there. Some feedback who uses it and against which version would be helpful.

Work Item Command Line 4.3

I worked with a colleague on the Work Item Command Line who was adding a feature for usage with a customer. That colleague had also done some changes related to availability and performance running queries. These changes where merged back into the code. WCL was missing some capabilities that I always wanted to have. I had a quick look to understand how much effort hat would be and took the opportunity to implement these capabilities on the way. While doing so, some small enhancements where added and some defects where found and fixed. All that needed to be published as a new version of WCL.

Print a work item

New in Version 4.3

The latest release 4.3 is available here and has the following changes:

  • Readme.md updated
  • Readme documents for deployment in source code updated
  • Refactored the capability to create a string representation for a work item attribute, link or pseudo attribute (e.g. attachments) into a helper class WorkItemExportHelper
  • Migrated -exportworkitems to use the new helper class WorkItemExportHelper
  • Several fixes in -exportworkitems to
    • Enable error handling and make suppressing errors work
    • Introduce a new flag that exports all supported columns and links
    • If exporting all columns, order the attributes and links (except ID, Type and Summary that are by default at the beginning)
    • Checked functionality with newest OpenCSV
    • Refactoring class to make maintenance easier
  • Added a new command -printworkitem that prints the attributes, attachments and supported links of a work item
    • Using the WorkItemExportHelper and its capabilities
    • Also provides switch to print all attributes and links ordered as above
    • Exports the attachments to a provided folder
  • Added a new command -printtypeattributes that allows to get the attribute Id’s and Display Names for a given work item type in a project area
  • Added a command -validateoslclinks that validates OSLC links and their back links in other applications fixing missing back links
  • External library dependencies are added without a version number to allow newer versions

Disclaimer

Please keep in mind that the information in this blog is “as is”, unsupported, and may be outdated or inaccurate.

The Work Item Command Line (WCL) is not an officially supported application.

For information on released products, consult the product documentation, support tech notes, and the Jazz.net library.

Open Items

Some of the API used in the Work Item Command Line becomes deprecated.

  • Some changes especially for -importworkitems needed for versions of RTC e.g. 6.0.5 and later
    • These will likely not work with earlier versions of RTC
    • if you need that either try an earlier version of WCL such as 4.0 or 4.1 or open an issue and I could look into a backport
  • The Linking API in RTC has evolved and deprecates some API used in WCL
  • OpenCSV has evolved and newer versions deprecates some API used in WCL
    • OpenCSV requires a new library commons-lang3-3.1.jar
  • Migration to Maven might be something to consider

This is all not problematic yet, but needs to be addressed sooner or later.

License

WCL is released under the MIT License. See the License.txt and the license headers in the individual files.

Compatibility

This code has been used with RTC 4.x, 5.x  and 6.x with no or minimal changes and it is pretty safe to assume, that the code will work with newer versions of RTC to come.

An exception is the -importworkitems command that requires a library to use a mapping file. The capability to use the mapping file was moved into the plain Java Client libraries in RTC 6.0.5 as an internal class. To support work item import with the mapping moved to the Plain Java Client Libraries as internal API, the imports in ImportWorkItemsCommand where changed and the file com.ibm.team.workitem.rcp.core*.jar was removed from the jar file dependencies in the build path.

See Restore Compatibility to 6.0.4 and before for how to switch this back.

The code requires the RTC Plain Java Client Libraries.

The Export and import commands require additional external libraries that need to be downloaded and installed separately. See the document below.

Restore Compatibility to 6.0.4 and older

To support 6.0.5 and beyond the imports in ImportWorkItemsCommand where changed from:

com.ibm.team.workitem.rcp.core.internal.bugzilla.mappers.BugzillaMapping*

to: com.ibm.team.workitem.common.internal.importer.bugzilla.mappers.BugzillaMapping*

and the file com.ibm.team.workitem.rcp.core*.jar was removed from the jar file dependencies in the build path.

Follow the description in the sections beginning with Downloads how to get and rebuild the code. The steps in this section below are required to port WCL back to RTC 4.0.4 and earlier:

The original imports have been put back in past 4.0.3, but commented out. To enable the mapping for earlier versions of RTC, replace the imports *BugzillaMapping* with the versions commented out. Then add the com.ibm.team.workitem.rcp.core_*.jar file back in to the build path and add the required JAR file as below

From Work Item Command Line 4.1

The import commands of WCL can only provide the capability to use a mapping file by using a JAR file that only ships with the RTC Eclipse client and the SDK. The classes used for the mapping file capability are located in the library com.ibm.team.workitem.rcp.core.  Open the Install location of the RTC Eclipse client and search for com.ibm.team.workitem.rcp.core*. You should find a file names similar to this one: com.ibm.team.workitem.rcp.core_3.1.900.v20141010_0124.jar. The version numbers at the end could be different. Copy the JAR file into the into the libfolder of your version of WCL.

Download

The latest code can be downloaded from this GIT repository. The latest releases can be downloaded from here

There are different ways to download.

  • The easiest is to download the latest code as a zip file using the button Clone or download.
    • Use the option Download ZIP to download the code as ZIP file. Once the download finishes, browse the folder structure of the ZIP file. The top level contains the README.md file. An Eclipse project is contained in the folder com.ibm.js.team.workitem.commandline. This project can be used to develop the code and to generate an executable.
    • It is also possible to clone the repository and import the project using GIT. Clone the GIT project to your local file system. This requires GIT or some GIT GUI to be installed. How to use GIT is out of the scope of this blog. See the help how to set up GIT and how to use it with Eclipse.
  • It is also possible to download releases from the releases page. The zip code made available is in the same format as the one above can be used as described above. Note that the releases might be older, and there might be no release available for the latest code version.

See below how to import the enclosed project into Eclipse.

Some releases might contain a prepackaged executable for convenience e.g. named wcl-V4.3-20190117.zip. See the section Deploying the packaged application below for how to use this form of packaging. Please note that the prepackaged executable might not be available for all versions. The following sections explain how to create this executable. See the section Packaging the application for shipping for how to perform the packaging.

Prerequisites

Install a current Eclipse or RTC Eclipse client.

Install a current Java 1.8 JRE or Java 1.8 JDK set it as active in Eclipse as Installed JRE and Execution Environment.

Getting the code, install and deploy

Once you have installed such an environment do the following

Import the Code

  • Open the Java Perspective in Eclipse.
  • Import the project into Eclipse from the file system.
    • To import the ZIP file use File>Import, select Existing Projects into Workspace. Click Select archive file, browse to and select the ZIP file you downloaded. Import the enclosed Eclipse project com.ibm.js.team.workitem.commandline.
    • To import the GIT repository use the GIT perspective to add the local cloned repository and then import the
      project com.ibm.js.team.workitem.commandline.

Create a User Library for the Plain Java Client Libraries

  • Use Window>Preferences>Java>BuildPath>User Libraries and add a user library named PlainJavaApi .
  • Add the JAR files of the Plain Java Client Libraries for the version of RTC you are using.

Download and Install openCSV

Download and Install Apache commons-lang

Check the project and recompile

  • Select Project>Clean and clean the project that was just imported.
  • There should be no compiler errors or issues with the classpath

The project should now have built and compiled and show no errors.

Building the WCL or extract from a Release

Follow the description in the file ReadMe – HowToRelease.txt in the root folder of the project

  • To create a wcl.jar file
  • To crate a WCL/lib folder
  • To provide batch and license files

Follow the description in the file /lib/ReadMe.txt in the lib folder of the project

  • To provide the required libraries in the WCL/lib folder

Select the folder, for example C:\Temp\wcl\ and compress the file

  • Rename the archive file to wcl-Vx-YYYYMMDD.zip,
    where YYYY is the year, MM is the month and DD is the day
  • The file is now ready for publishing

Use the file wcl-Vx-YYYYMMDD.zip for shipping similar to the next section.

Deploying the packaged application

Assume a file was created following the steps above and the file is called
wcl-V4.3-20190117.zip. This binary contains WCL as JAR file and other information such as licenses and Readme files. It also contains script files to set the environment and run the Jar File.

The folder lacks libraries needed to execute that need to be provided.

To deploy from this file, create a new folder as deploy location for the automation prototype. In the description here we use C:\temp. It is possible to use any other folder. In this case replace the folder in the this description by the folder you chose.

Extract the binary wcl-V4.3-20190117.zip file into the location C:\temp. There should now be a folder C:\temp\WCL. The folder among others contains the files wcl.jar, wcl.bat, wcl.sh.

Get the libraries as described in Download and Install openCSV and Download and Install Apache commons-lang above, and rename them as described in /lib/ReadMe.txt.

Check the script file and make sure to provide a valid path to a folder containing the unzipped Plain Java Client Libraries and a recent Java 1.8 is available over a Java_Home.

Call WCL using the script files or call it as Jar File as described in said script files.

Just starting with extending RTC?

If you just get started with extending Rational Team Concert, or create API based automation, start with the post Learning To Fly: Getting Started with the RTC Java API’sand follow the linked resources.

You should be able to use the following code in this environment and get your own automation or extension working.

Summary

This is only the first blog. I will try to provide a little bit more about the commands and the parameters soon.

As always, I hope this helps users out there. 

Please ask questions on in https://jazz.net/forum/questions/ and tag them rational-team-concert and wcl.

You can create issues in https://github.com/jazz-community/work-item-command-line/issues as well. 

Keep in mind this is off hours work and not officially supported.

Work Item Command Line 4.1

I recently had a chat with a colleague who is trying to automate RTC Work Item creation. As a casual user without administration experience they where wondering how to find the IDs for the work item types to be able to create work items of the types in WCL. Today you must know the ID of the work item and look them up in the administration UI.

I always wanted to add the ability to be able to list the available work item types in WCL, but for whatever reason I never got to searching the API and add it to WCL.  Having some time last week I took the opportunity to finally implement it. This closes a last big gap that WCL left open. Users can now print the work item types and with that information print the attributes available on the work item type.

A small description how to use WCL can be found here. WCL prints a help if the command is omitted. The help information is very long. Make sure to redirect it into a file or increase the shell buffer size.

This post provides the code for the latest version of WCL and also a description how to install WCL.

License

WCL is released under the MIT License. See the License.txt and the license headers in the individual files.

Compatibility

This code has been used with RTC 4.x, 5.x  and 6.x with no or minimal changes and it is pretty safe to assume, that the code will work with newer versions of RTC to come. The code requires the RTC Plain Java Client Libraries. The Export and import commands require additional external libraries that need to be downloaded and installed separately. See the document below.

Download

Source Code for Download

The code is available in the Jazz Community. WCL 4.1 is available in this release.

Project

Additional Download

You can also download the latest version 4.1 here:

Changes

Added a command printtypes to list the work item types available for a project area.

wcl -printtypes repository="https://clm.example.com:9443/ccm" user=ralph password=****** projectArea="JKE Banking (Change Management)"

lists the work item types. The output will look like below:

printtypes

The Type ID is the work item type ID required to set and get work item information. The type category is an additional information to understand if work item types have the same workflow.

Download the Plain Java Client Libraries

WCL requires at least the RTC Plain Java Client Libraries for your version of RTC. To download that, open the All Downloads tab of the RTC version you are interested in. For example https://jazz.net/downloads/rational-team-concert/releases/6.0.5?p=allDownloads and scroll down to the Plain .zip Files section.

PlainJava

Download the RTC Plain Java Client Libraries file.

Use 7Zip and unzip the RTC Plain Java client Libraries download file (for example named RTC-Client-plainJavaLib-6.0.5.zip). Use 7Zips Extract Files command and provide the extraction Path for example C:\RTCWCL\PlainJavaAPI. Remember the location for later.

Optional: Download the Plain Java Client Libraries API documentation and extract it to the same folder you extracted the RTC Plain Java client Libraries download.

How to Install WCL

There are several ways how the WCL can be set up and run. The two main methods are:

  1. As pre-compiled Java e.g in a jar file using a batch file
  2. Using launch files to run or debug in Eclipse

The following sections explain the first method.

Create Packaged Version

To package your own version of WCL for release from the source code, setup your development environment as described in the next section. Then follow the document ReadMe – HowToRelease.txt in the eclipse project com.ibm.js.team.workitem.commandline you can find in the source code to package WCL.

Install Packaged Version

If you download the packaged, executable application latest version 4.1, the download is already packaged and prepared. The downloaded file is compressed and will be named like WCL_V4.1_20180323.zip. Extract the WCL package file e.g. using 7Zip to a folder, for example C:\RTCWCL.

The folders structure should look as below.

WCLCommandLine

Check and Adjust the Script File

To work, the WCL needs a Java JRE or JDK. Open the file wcl.bat or wcl.sh. Provide a JRE or JDK. I Usually use a JRE that comes with the CCM server or a JDK that comes with the Eclipse client. However any compatible JRE should do.

Change the JAVA_HOME variable to point to a location containing a JRE. If needed, remove the path section  JRE from the final call.

BatchFile

If you installed the Plain Java Client Libraries API into a different location, set the variable PLAIN_JAVA to that folder location.

Make sure the files are executable and test WCL e.g. by calling wcl and running one of the commands. For example use the new prittypes command

wcl -printtypes repository="https://clm.example.com:9443/ccm" user=ralph password=****** projectArea="JKE Banking (Change Management)"

Provide Additional Libraries

The export and the import commands of WCL need two libraries that are not shipped with the downloads.

If you use the packaged WCL and want to use the export/import capability follow the steps below to add the required libraries to the folder lib in the folder lib in the WCL folder.

If you use the Eclipse project for WCL and want to use the export/import capability follow the steps below to add the required libraries to the folder lib in the Eclipse project com.ibm.js.team.workitem.commandline.

The export and the import commands of WCL use the Open CSV Library. I had issues with the newer versions of Open CSV that I could not resolve, so this code assumes the version 3.7. Download the version 3.7 from here. Uncompress and untar the the file opencsv-3.7-src-with-libs.tar.gz you downloaded. Look for the folder opencsv-3.7 deploy\ copy the JAR file opencsv-3.7.jar and put it into the lib folder of your version of WCL.

It is possible to use other such libraries like SuperCSV with minor changes to the source code as well.

The import commands of WCL can only provide the capability to use a mapping file by using a JAR file that only ships with the RTC Eclipse client and the SDK. The classes used for the mapping file capability are located in the library com.ibm.team.workitem.rcp.core.  Open the Install location of the RTC Eclipse client and search for com.ibm.team.workitem.rcp.core*. You should find a file names similar to this one: com.ibm.team.workitem.rcp.core_3.1.900.v20141010_0124.jar. The version numbers at the end could be different. Copy the JAR file into the into the lib folder of your version of WCL.

Installing the Source Code

The best approach to develop for the RTC Java APIs is, to setup the development environment based on the RTC SDK . This provides with the source code for the API and allows to search examples. This saves so much time in the long run that saving the effort of setting the SDK makes no sense. So follow the instructions in the next section.

Just starting with extending RTC?

If you just get started with extending Rational Team Concert, or create API based automation, start with the post Learning To Fly: Getting Started with the RTC Java API’s and follow the linked resources.

Importing the Source Code

Get the source code from the Jazz Community. Use Git to clone the project and import the source project into Eclipse. You can also download the source as a zip file and import the project with the other Eclipse Import wizards. Switch to the Java perspective or the Plug in Development perspective.

The project should look as below

SorceProject

The folders contain the information to build the jar file, to run the and debug the code, folder for additional libraries and the scripts to run the Java application from a shell.

The Eclipse project is a Plug-in development project. This trick provides the access to the SDK and the API source code.

Install The Plain Java Client Libraries

The project references the Plain Java Client Libraries and needs them to run.

BuildPath

So the minimum additional step needed to be able to run the WCL for development in Eclipse is to install the RTC Plain Java Client Libraries as a user library.  The Plain Java Client Libraries have already been downloaded and installed. The same folder with the install can be used in the next steps.

Open Windows>Preferences and type “User lib” into the search window.

BuildPath_2

In the Java>Build Path User Libraries click the New… button. Type the name that is alreay referenced: PlainJavaAp. Click OK.

Select the new User Library and click Add External JARs…

BuildPath_3

Browse to the folder containing the Plain Java Client Libraries C:\RTCWCL\PlainJavaAPI in this example. Select all JAR files and click open.

BuildPath_4

The User Library should now contain the libraries.

BuildPath_5

Go back to the section “Provide Additional Libraries” and add the libraries to the folder lib. Make sure the libraries are available. Remove and re add the jar files to the build path if needed.

You should now be able to run or debug the WCL from within Eclipse. The debug configurations shipped with the source code in the Launches folder are now available under the Debug>Debug Configuration section.

Launches

Change the configurations as needed.

To package your own version of WCL for release from the source code, follow the document ReadMe – HowToRelease.txt in the eclipse project com.ibm.js.team.workitem.commandline you can find in the source code to package WCL.

Summary

You should now be able to start working on WCL and enhance it if needed. I hope this document helps the many users out there.

The Work Item Command Line is now Open Source

To allow customers to use and share the WorkItem Command Line freely, it has now been released under the MIT License.

Access the Source Code

The code is available in the Jazz Community.

OpenSourceGitHub

License

Released under the MIT License. See the License.txt and the license headers in the individual files.

Changes

The current version uploaded there contains the capabilities described in The RTC Work Item Command Line on Bluemix.

Additional Download

You can also download the latest version 4.0 here:

Please note, there might be restrictions to access Dropbox and therefore the code in your company or download location.

Usage and install

Please see the posts A RTC WorkItem Command Line Version 3.0.

For the general setup follow the description in A RTC WorkItem Command Line Version 2.

For usage follow the description in A RTC WorkItem Command Line Version 2 and in A RTC WorkItem Command Line Version 2.1. Check the README.txt which is included in the downloads.

Summary

The work item command line is now available on IBM Bluemix Dev Ops Services and can be accessed and worked on there.

The RTC Work Item Command Line on Bluemix

I was talking to a customer recently. They are using the WorkItem Command Line for some automation purposes. Since this can trigger e-mail notifications to a huge amount of users they wanted to use the new Skip Mail save WorkItem Parameter introduced in RTC 6.0 iFix3.

I had the time and went ahead implementing it. The resulting source code is available on IBM Bluemix DevOps Services in the project Jazz In Flight

ibm-bluemix-devops-services-2016-10-24_17-55-35

Access the Source Code

License

The post contains published code, so our lawyers reminded me to state that the code in this post is derived from examples from Jazz.net as well as the RTC SDK. The usage of code from that example source code is governed by this license. Therefore this code is governed by this license. I found a section relevant to source code at the and of the license. Please also remember, as stated in the disclaimer, that this code comes with the usual lack of promise or guarantee. Enjoy!

RTC SCM Access

In the project you can access the source code of several extensions and automation I have created over the years. If you click Edit Code and you are not yet member of the project, you have to request access which I will allow.

The project contains a Stream called RTC Extensions with several components. One of the components is Work Item Command Line.

configure-eclipse-request-access-2016-10-24_18-13-14

To configure your RTC Eclipse client follow the instructions in the Configure eclipse client link. You can then create yourself a repository workspace and download the code. Please use the tracking and planning section (work items) if you want to do any changes to coordinate with me.

Changes

The current version uploaded there contains the capabilities described in A RTC WorkItem Command Line Version 3.0 plus a variety of bug fixes and a new switch /skipEmailNotification to disable work item update notification for the commands that modify work items such as

  • update
  • importworkitems
  • migrateattribute

The feature to suppress work item update notification is implemented in RTC 6.0 iFix3 where a new Skip Mail save WorkItem Parameter was introduced in RTC. When this additional save parameter is provided, the work item change does not trigger a work item change notification mail.The adoption in the WorkItem Command Line is done in a way that the implementation does not break the older API.  It introduces the additional save parameter value into the work item command line source code as new String constant instead of referencing the constant in the API. This way the WCL can be compiled with RTC Plain Java Client Library versions of RTC prior to 6.0 iFix3. If the WCL is run with versions earlier than 6.0 iFix3, e-mail notification is not suppressed. The behavior does not change in such versions of RTC and the additional save parameter is simply ignored.

Additional Download

You can also download the latest version 3.4 here:

Please note, there might be restrictions to access Dropbox and therefore the code in your company or download location.

Usage and install

Please see the posts A RTC WorkItem Command Line Version 3.0.

For the general setup follow the description in A RTC WorkItem Command Line Version 2.

For usage follow the description in A RTC WorkItem Command Line Version 2 and in A RTC WorkItem Command Line Version 2.1. Check the README.txt which is included in the downloads.

Summary

The work item command line is now available on IBM Bluemix Dev Ops Services and can be accessed and worked on there.

A RTC WorkItem Command Line Version 3.0

I was interested in how complex it might be to export work items and import them again. So I looked into this and enhanced the work item command line (WCL) to support this.

I found it quite challenging to develop this. There are a lot of things to consider, so I drove this to a point that was sufficient for my purposes. The tool is used by my team to import work items from a CSV file we receive every now and then.

I implemented another export/import mode with some more capabilities and it works in tests, but is by no means production ready. The amount of necessary tests and test automation to make this reliable, is just overwhelming. So this is not thoroughly tested.

So be careful if using these commands, and do a good amount of testing before actually using this. The problem is, there are so many possible use cases and dependencies that it is very hard to develop this kind of capability and to test it.

One special case is importing/creating links. Some links have constraints i.e. parent and especially child links. A work item can not have multiple parents. So setting child links can cause the save to fail if the new child has already a different parent.

Solution Overview

The work item command line WCL now supports two new commands

  • exportworkitems
  • importworkitems

To export work items to a CSV file and import work items from a CSV file.

I chose to use a CSV file, because RTC itself can export and import that format already. It would be ideal if export and import from XML would be supported as well, but this would require a substantial effort to abstract the export and import operations to be able to use a strategy (or some other useful pattern to support abstraction).

No Support or Maintenance

This is provided as-is with no support or guarantee. This is not a tool that is officially supported by IBM or any other organization.

Please note, that I have very little time to do this and testing is always lacking. So take the code published here with a grain of salt. On the positive side, you have the code, can debug and enhance it.

Compatibility

This code has been used with RTC 4.x and 5.x with no changes and it is pretty safe to assume, that the code will work with newer versions of RTC. The code requires two external libraries that need to be downloaded and installed separately.

License and Download

The post contains published code, so our lawyers reminded me to state that the code in this post is derived from examples from Jazz.net as well as the RTC SDK. The usage of code from that example source code is governed by this license. Therefore this code is governed by this license. I found a section relevant to source code at the and of the license. Please also remember, as stated in the disclaimer, that this code comes with the usual lack of promise or guarantee. Enjoy!

Update: Added switch to change the export and import formats for dates, see details below. I also added a switch to suppress attribute not found errors and other frequent errors during export.

Update: Fixed duration set problem. Version updated to 3.2

You can download the latest version from this post The RTC Work Item Command Line On Bluemix. The older version 3.0 can be found here:

Please note, there might be restrictions to access Dropbox and therefore the code in your company or download location.

Just Starting With Extending RTC?

If you just get started with extending Rational Team Concert, or create API based automation, start with the post Learning To Fly: Getting Started with the RTC Java API’s and follow the linked resources.

You should be able to use the following code in this environment and get your own automation or extension working. The code linked from this post contains Client API.

Setup and Usage

For the general setup follow the description in A RTC WorkItem Command Line Version 2 and look at the additional setup steps below.

For usage follow the description in A RTC WorkItem Command Line Version 2 and in A RTC WorkItem Command Line Version 2.1. Check the README.txt which is included in the downloads.

Export Work Items

The export work items command has the syntax

-exportworkitems {Switch} repository=”value” user=”value” password=”value” projectArea=”value” query=”value” exportFile=”value”  [columns=value] [encoding=value] [delimiter=value] [querysource=value]

Required Parameters are

  • repository=”value” – the repository URI, for example repository=”https://clm.example.com:9443/ccm
  • user=”value” – The user ID of the user executing the command, for example user=”ralph”
  • password=”value” – the password of the user, for example password=”password”
  • projectArea=”value” –  The project area to export items from, for example projectArea=”JKE Banking (Change Management)”
  • query=”value” – the name of the query to use, for example query=”All WorkItems”
  • exportFile=”value” – The path of the export file, for example exportFile=”C:\aaTemp\Export\Test.csv”; the folder that contains the export file must exist

Optional Parameters are

  • columns=value – The names or ID’s of the work item attributes to export; example columns=”Type,Id,Planned For,Filed Against,Description,Found In”; To specify the colums it is possible to use the name or the ID of the attribute, the switch headerIDs specifies the output format to use the ID instead of the name in the output; It is possible to use the values from an RTC Eclipse client export
  • encoding=value – The encoding; default encoding=”UTF_16LE”; options see available charset names; if the encoding is chosen different for export and import, the values will not be recognizable
  • delimiter=value – The delimiter to be used between the columns. Default is comma delimiter=”,”
  • querysource=value – If the parameter is omitted the command searches a personal query with the given name; if the value is provided a query shared by the process area is searched, a complete path from the project area to the sharing process area must be provided, for example querysource=”JKE Banking(Change Management),JKE Banking(Change Management)/Business Recovery Matters”
  • timestampFormat=value – To specify the time stamp format to be used; default “MMM d, yyyy hh:mm a”;  see SimpleDateFormat for the supported pattern

Available switches are:

  • /ignoreErrors – Ignore minor errors in mapping and value lookup
  • /asrtceclipse – Export in a format compatible to the RTC CSV export and import; if the switch is not provided, the data is exported in a format that is compatible with the syntax used by the work item command line WCL to identify elements; see A RTC WorkItem Command Line Version 2 for the supported value representations
  • /headerIDs – Export header values as attribute IDs and not as attribute names
  • /suppressAttributeExceptions – Suppresses exceptions thrown for attributes that are not available on the work item type of for attribute types that are not yet implemented

Example

-exportworkitems /ignoreErrors repository="https://clm.example.com:9443/ccm" user=ralph password=ralph projectArea="JKE Banking (Change Management)" exportFile="C:\aaTemp\Export\Test.csv" query="All" columns="workItemType,summary,Attachments"

Import Work Items

The import work items command has the syntax

-importworkitems{Switch} repository=”value” user=”value” password=”value” projectArea=”value” query=”value” importFile=”value”  [columns=value] [encoding=value] [delimiter=value] [querysource=value]

Required Parameters are

  • repository=”value” – the repository URI, for example repository=”https://clm.example.com:9443/ccm
  • user=”value” – The user ID of the user executing the command, for example user=”ralph”
  • password=”value” – the password of the user, for example password=”password”
  • projectArea=”value” –  The project area to export items from, for example projectArea=”JKE Banking (Change Management)”
  • importFile=”value” – The path of the import file, for example importFile=”C:\aaTemp\Export\Test.csv”

Optional Parameters are

  • mappingFile=”value” – A RTC work item import mapping file, for example mappingFile=”C:\temp\mapping.xml”; the file must be generated by RTC and customized to match the value mapping
  • encoding=value – The encoding; default encoding=”UTF_16LE”; options see available charset names; if the encoding is chosen different for export and import, the values will not be recognizable
  • delimiter=value – The delimiter to be used between the columns. Default is comma delimiter=”,”
  • timestampFormat=value – To specify the time stamp format to be used; default “MMM d, yyyy hh:mm a”;  see SimpleDateFormat for the supported pattern

Available switches are:

  • /ignoreErrors – Ignore minor errors in mapping and value lookup
  •  /importmultipass – Import the work items from the CSV file in a first iteration and build up a mapping for the ID’s provided in the import file and the actual ID’s created and recreate the work item links between the new work items based on that mapping in a second pass; the old work item ID for a work item has to be provided in a special column with header name com.ibm.js.oldid
  • /forcelinkcreation – if no target work item can be found in the map, use the given ID to create the link
  • /importdebug – Print more information during import attempts to help with finding issues
  • /enforceSizeLimits – Attributes such as description and medium strings have size limits, if this switch is set, the importer tries to clip content to avoid exceptions due to the size limits

Example

-importworkitems  /enforceSizeLimits  /importmultipass  /ignoreErrors repository="https://clm.example.com:9443/ccm" user=ralph password=ralph projectArea="ImportTest1" importFile=""c:\aaTemp\ExportImport\TestExportAll.csv"

RTC Eclipse Compatible Export Mode

In mode asrtceclipse, all data is exported the way RTC would export them in Eclipse. This means that certain information for example links, team areas, iterations, attachments and other data is exported in a way that makes it hard to map to data in the repository.

The import command does its best to map based on names, but for complex hierarchical information such as iterations and team areas, there is currently no search implemented that will find the object successfully. It would be possible to implement such methods, with some effort.

Example: An iteration is part of a timeline. The timeline is needed to find the iteration within. If there is no information about the timeline, it would be required to iterate all timelines with a good chance of mismatch.

The import command will try to find things by name and ID, with the limitations above.

If the work item ID attribute is provided as a column the importer will try to find the work item and update it during the import.

Default Export Mode

In the default export mode, the RTC Work Item Command line export command exports the data in greater detail, which makes it easier for the importer to identify the item.

Attachments

In default mode, the attachment is exported as a file relative to the location of the generated csv file. The attachment is downloaded to a location ./attachments//. So for each exported work item with attachments, a separate folder is created. The attachments are stored in that folder and the export information in the csv file is created compatible to the WCL parameter format to allow later import of the attachments, including upload and applying the additional information.

Other Complex Items and Links

Other complex items such as iterations and team areas are also exported with a lot more details. An iteration is being exported as path, including the timeline and parent iterations. A team area is also exported as path containing the Project are name and parent team area names

Multi-Pass Import

Importing work items and recreating the link relationships between them is problematic, because while importing the work items the link target may not yet exist. To be able to import a set of work items and then recreate the linkage, it is necessary to do the import and then map the ID of the old work item to the ID of the new work item.

When using the RTC CSV importer in the Eclipse client, existing work items are provided with a # in front of the work item ID. To do an import and then recreate the links between the new work items (and not to the old ones in the import), a user would have to run the import without the links, then replace the work item ID’s in the import file by the new work item ID’s and update the work items with a second import. This is very manual and error prone.

The switch importmultipass  enables an import mode, where the WCL tries to create the links between the imported work items, rather to the old ones. It imports the work items in two passes. It creates the work items in the first pass and ignores the link creation. In the second pass it tries to create the links. For links between work items WCL tries to find the work items that were created during the import and tries to match the links to the new work items, where possible.

Note: Only links between work items are handled this way. Links to objects other than work items are recreated using the values provided in the import file.

To be able to do this, the import file has to provide the old work item ID of the work items that are imported. The import requires a special ID for the columns containing the old ID’s. The column header for this column has to be specified with com.ibm.js.oldid.

The import file below has been created using an export that included the ID of the work item in the export. The old column header for example ID of the column has been replaced by com.ibm.js.oldid. The work item links show the ID’s of the linked work items with their old ID’s.

Import Work Items With LinksThe import works as follows.

The WCL runs the first pass and imports the work items. It stores the mapping between the original work item ID from the column com.ibm.js.oldid and the ID of the newly created work item in a map. Links are not created in this pass.

In the second pass WCL reads the import file again and only handles the columns that represent links. It detects if the link target represents a work item. If not, it tries to recreate the link as it is. If the link is a work item link, WCL tries to calculate if a new work item was created for the target using the map. If the work item was imported and a new ID is available, the new work item ID is used to create the link.

If the ID of the link target can not be found in the mapping, WCL can either ignore the link or it can try to create the link to the original work item. WCL supports these two modes. By default, the link is not created. If the switch forcelinkcreation is specified, the original value of the target work item ID is used as target for the link, if no mapping to a newly imported item was found.

Creating links is not trivial. One special case is importing/creating links. Some links have constraints i.e. parent and especially child links. A work item can not have multiple parents. So setting child links can cause the save to fail if the new child has already a different parent. This can create issues in import scenarios, especially if an export from the same repository is imported and the import causes child links to be created that have already another parent. In this case the import will fail with an error.

Limitations

Approvals and comments are imported into one comment. The effort to recreate approvals is just too big and I can’t see the added value.

Special Notes On Setup

For the general setup follow the description in A RTC WorkItem Command Line Version 2 and look at the additional setup steps below.

The export and the import commands of WCL need two libraries that are not shipped the downloads.

If you use the packaged WCL and want to use the export/import capability follow the steps below to add the required libraries to the folder lib in the folder lib in the WCL folder.

If you use the Eclipse project for WCL and want to use the export/import capability follow the steps below to add the required libraries to the folder lib in the Eclipse project com.ibm.js.team.workitem.commandline.

The export and the import commands of WCL use the Open CSV Library. I had issues with the newer versions of Open CSV that I could not resolve, so this code assumes the version 2.3. Download the version 2.3 from here. Uncompress and untar the the file opencsv-2.3-src-with-libs.tar.gz you downloaded. Look for the folder opencsv-2.3\deploy\ copy the JAR file opencsv-2.3.jar and put it into the lib folder of your version of WCL.

The import commands of WCL can only provide the capability to use a mapping file by using a JAR file that only ships with the RTC Eclipse client and the SDK. The classes used for the mapping file capability are located in the library com.ibm.team.workitem.rcp.core.  Open the Install location of the RTC Eclipse client and search for com.ibm.team.workitem.rcp.core*. You should find a file names similar to this one: com.ibm.team.workitem.rcp.core_3.1.900.v20141010_0124.jar. The version numbers at the end could be different. Copy the JAR file into the into the lib folder of your version of WCL.

The packaged version should look like below.

Deployed Packaged WCLIf you have imported the Eclipse project for WCL open Configure Build Path and create a user library named openCSV and add the Open CSV library opencsv-2.3.jar. Create a user library named rtcmapping and add the com.ibm.team.workitem.rcp.core library you just copied to it.

Your Eclipse Project should now look like below.

Eclipse Project and LibrariesCode Changes

During the work on import and export, the code structure was left untouched. Some classes were added to be able to handle the column header and some additional mapping of id’s and names i.e. for link types. In addition some of the code that was piling up in the WorkItemUpdateHelper (formerly known as WorkItemHelper) was moved to utility classes. this makes it also easier to look for useful API in case you are interested in how things work in the RTC API. See the scree shot below.

Code StuctureSummary

This WorkItem Command Line should allow for most of the automation needs when creating work items. In addition it is a nice resource for the RTC work Item API.

As always, I hope the post is an inspiration and helps someone out there to save some time. If you are just starting to explore extending RTC, please have a look at the hints in the other posts in this blog on how to get started.

A RTC WorkItem Command Line Version 2.2

Creating links is not easy. Many things can go wrong.  Testing by a user showed that there was an issue with links between work items and build results. I found that I got the link direction wrong. I fixed that. Here is the updated source code.

Latest Version

See A RTC WorkItem Command Line Version 3.0 for the latest version.

Related posts

License

The post contains published code, so our lawyers reminded me to state that the code in this post is derived from examples from Jazz.net as well as the RTC SDK. The usage of code from that example source code is governed by this license. Therefore this code is governed by this license. I found a section relevant to source code at the and of the license.

Please also remember, as stated in the disclaimer, that this code comes with the usual lack of promise or guarantee.

On the other hand, you have the code and are able to add your own code to it. It would be nice to know what you did and how, if you do so.

Just Starting With Extending RTC?

If you just get started with extending Rational Team Concert, or create API based automation, start with the post Learning To Fly: Getting Started with the RTC Java API’s and follow the linked resources.

You should be able to use the code attached to this post in the development environment you set up in the Rational Team Concert Extensions Workshop and get your own extensions or automation working there as well.

Download

You can download the latest version here:

Setup and Usage

Follow the description in A RTC WorkItem Command Line Version 2 and in A RTC WorkItem Command Line Version 2.1. Check the README.txt which is included in the downloads.

A RTC WorkItem Command Line Version 2.1

In the last post Extending the WorkItem Command Line With New Commands we added a new command to the WorkItemCommandLine to implement a solution for attribute data migration as explained in Workaround: Migrate from Rational Team Concert 3.X string attribute used as multi-select lists to RTC 4.X enumeration lists.  Here is the updated source code.

Latest Version

See A RTC WorkItem Command Line Version 3.0 for the latest version.

What’s new?

This version of the RTC WorkItem Command Line has a new command that allows to migrate RTC 3.x multi-select enumeration data stored in string type attributes, containing Enumeration Literals separated by comma ‘,’ into the new EnumerationList attribute type.

Related posts

License

The post contains published code, so our lawyers reminded me to state that the code in this post is derived from examples from Jazz.net as well as the RTC SDK. The usage of code from that example source code is governed by this license. Therefore this code is governed by this license. I found a section relevant to source code at the and of the license.

Please also remember, as stated in the disclaimer, that this code comes with the usual lack of promise or guarantee.

On the other hand, you have the code and are able to add your own code to it. It would be nice to know what you did and how, if you do so.

Just Starting With Extending RTC?

If you just get started with extending Rational Team Concert, or create API based automation, start with the post Learning To Fly: Getting Started with the RTC Java API’s and follow the linked resources.

You should be able to use the code attached to this post in the development environment you set up in the Rational Team Concert Extensions Workshop and get your own extensions or automation working there as well.

Download

You can download the latest version here:

Setup

Follow the setup description in A RTC WorkItem Command Line Version 2

The Syntax of the new Command

WCL uses the following syntax for the new command:

wcl -migrateattribute {/ignoreErrors} repository=RepoitoryURI user=user password=password projectArea=ProjectAreaName workItemType=typeID { id=WorkItemID } sourceAttributeID=AttributeID targetAttributeID=AttributeID

Where the sourceAttributeID must be the ID of a work item attribute of any string type. The content must be Enumeration Literal ID’s, separated by comma stored by a RTC 3.x muti-select EnumerationList presentation. In RTC 3.x the attribute type used to store the enumeration literal ID’s was a small or medium string. The command only checks for any string.

The targetAttributeID must be the ID of a work item attribute of type EnumerationList, where the enumeration and thus the literal ID’s must match the enumeration used in the source attribute.

If the attribute types don’t match the required types or the finds literal ID’s that don’t match a literal in the target enumeration, the work item is not changed. The user requires the permission to read and write the work items.

The image below shows the source attribute as shown in RTC 4.x with a regular string presentation and the new EnumerationList attribute. The values from the source attribute have been migrated over to the target attribute.

Source and target attribute

Below are examples how to launch the WorkItem command Line. The first example runs the migration for all work item of a specific type in a project area.

wcl -migrateattribute /ignoreErrors repository="https://clm.example.com:9443/ccm" user=ralph password=ralph projectArea="JKE Banking (Change Management)" workItemType=task sourceAttributeID=custom.medium.string targetAttributeID=custom.enumeration.list

The second example is used for testing and only works on the work item with the specified ID.

wcl -migrateattribute /ignoreErrors repository="https://clm.example.com:9443/ccm" user=ralph password=ralph projectArea="JKE Banking (Change Management)" workItemType=task  id=275 sourceAttributeID=custom.medium.string targetAttributeID=custom.enumeration.list

Extending the WorkItem Command Line With New Commands

If one needs a new command to be run in the WorkItem Command Line, what needs to be done? Lets explore this with the background from the post The WorkItem Command Line Explained.

As always, keep in mind, this is not production code, under development and not designed to win a beauty pageant. Testing has not been very thorough, so using this code is at your own risk.

Latest Version

See A RTC WorkItem Command Line Version 3.0 for the latest version.

The New Command

The new command is supposed to help with migrating Multi Select Enumeration  attributes available until RTC 3.x to Enumeration List attributes available in RTC 4.x and later.

As explained in Workaround: Migrate from Rational Team Concert 3.X string attribute used as multi-select lists to RTC 4.X enumeration lists, in RTC 3.x these multi select lists where implemented as a string attribute, that stored the enumeration literal ID’s separated by comma. A special presentation handled input and output. Downside of this approach was, that it was hard to query these attributes and create dashboards and reports. The new way is a special list type for each enumeration.

The workaround explains how to use CSV export and import to migrate the data. This solution uses the API to do so. What this solution does not attempt so far is having a mapping that changes the data.

Related posts

License

The post contains published code, so our lawyers reminded me to state that the code in this post is derived from examples from Jazz.net as well as the RTC SDK. The usage of code from that example source code is governed by this license. Therefore this code is governed by this license. I found a section relevant to source code at the and of the license.

Please also remember, as stated in the disclaimer, that this code comes with the usual lack of promise or guarantee.

On the other hand, you have the code and are able to add your own code to it. It would be nice to know what you did and how, if you do so.

Just Starting With Extending RTC?

If you just get started with extending Rational Team Concert, or create API based automation, start with the post Learning To Fly: Getting Started with the RTC Java API’s and follow the linked resources.

You should be able to use the code attached to this post in the development environment you set up in the Rational Team Concert Extensions Workshop and get your own extensions or automation working there as well.

Download

Download the latest version that includes the code from this post.

Requirements

The command is supposed to work on work items of a specific type in a project area.

  • For a source attribute (of type string), read the value, split it into enumeration literal ID’s
  • Find the enumeration literals and build a list from them
  • Store the list of enumeration literals in a target attribute
  • Perform this for one work item of the type (e.g. for testing)
  • Perform this for all work items of the type
  • Be able to tolerate errors and run nonetheless

The image below shows the source attribute as shown in RTC 4.x with a regular string presentation and the new EnumerationList attribute. The values from the source attribute have been migrated over to the target attribute.

Source and target attribute

Creating the new Command

The first step is to create a new command class. As explained in The WorkItem Command Line Explained there are some abstract classes available to be used. The AbstractWorkItemModificationCommand seems to be it, but looking closer, it is very specialized in creating or modifying a work item with a list of provided attributes and values in a parameter list. So the choice here is the AbstractTeamRepositoryCommand instead.

So the first step is to create the class MigrateWorkItemAttributeCommand in the package com.ibm.js.team.workitem.commandline. Create a public constructor as required from the abstract class and override the abstract methods. In the method getCommandName() return the name of the command. Also override the method setRequiredParameters() but make sure to add a call to super() to get the parameters it requires added. The initial step would look similar to this:

public class MigrateWorkItemAttributeCommand extends
		AbstractTeamRepositoryCommand {

	public MigrateWorkItemAttributeCommand(ParameterManager parametermanager) {
		super(parametermanager);
	}

	/***
	 * Add required parameters
	 * 
	 * (non-Javadoc)
	 * 
	 * @see com.ibm.js.team.workitem.commandline.framework.AbstractTeamRepositoryCommand#setRequiredParameters()
	 */
	@Override
	public void setRequiredParameters() {
		super.setRequiredParameters();
	}

	/***
	 * Return the command
	 * 
	 * (non-Javadoc)
	 * 
	 * @see com.ibm.js.team.workitem.commandline.framework.IWorkItemCommand#getCommandName()
	 */
	@Override
	public String getCommandName() {
		return "migrateattribute";
	}

	/***
	 * Perform the command
	 * 
	 * (non-Javadoc)
	 * 
	 * @see com.ibm.js.team.workitem.commandline.framework.AbstractCommand#process()
	 */
	@Override
	public OperationResult process() throws TeamRepositoryException {
		return getResult();
	}
}

In addition to the repository URL, the user name and the password, the command needs to know the project area, and the the work item type. It also needs the parameter for the source attribute ID and the target attribute ID. Some flags like ignoreErrors might come in handy as well.

Most of this can be harvested from existing commands like the CreateWorkItemCommand.  A few new need to be added. Introducing some constants is a good idea for later. The code added to setRequiredParameters() would finally look like below. The call to super() makes sure the basic parameters for the login process are required as well.

public static final String COMMAND_MIGRATE_ENUMERATION_LIST_ATTRIBUTE = "migrateattribute";
public static final String PARAMETER_SOURCE_ATTRIBUTE_ID = "sourceAttributeID";
public static final String PARAMETER_SOURCE_ATTRIBUTE_ID_EXAMPLE = "com.acme.custom.enum.multiselect";
public static final String PARAMETER_TARGET_ATTRIBUTE_ID = "targetAttributeID";
public static final String PARAMETER_TARGET_ATTRIBUTE_ID_EXAMPLE = "com.acme.custom.enum.list";


/***
 * Add required parameters
 * 
 * (non-Javadoc)
 * 
 * @see com.ibm.js.team.workitem.commandline.framework.AbstractTeamRepositoryCommand#setRequiredParameters()
 */
@Override
public void setRequiredParameters() {
	super.setRequiredParameters();
	// Copied from CreateWorkItemCommand
	getParameterManager()
			.syntaxAddRequiredParameter(
					IWorkItemCommandLineConstants.PARAMETER_PROJECT_AREA_NAME_PROPERTY,
					IWorkItemCommandLineConstants.PARAMETER_PROJECT_AREA_NAME_PROPERTY_EXAMPLE);
	getParameterManager()
			.syntaxAddRequiredParameter(
					IWorkItemCommandLineConstants.PARAMETER_WORKITEM_TYPE_PROPERTY,
					IWorkItemCommandLineConstants.PARAMETER_WORKITEM_TYPE_PROPERTY_EXAMPLE);
	getParameterManager().syntaxAddSwitch(
			IWorkItemCommandLineConstants.SWITCH_IGNOREERRORS);
	getParameterManager().syntaxAddRequiredParameter(
			PARAMETER_SOURCE_ATTRIBUTE_ID,
			PARAMETER_SOURCE_ATTRIBUTE_ID_EXAMPLE);
	getParameterManager().syntaxAddRequiredParameter(
			PARAMETER_TARGET_ATTRIBUTE_ID,
			PARAMETER_TARGET_ATTRIBUTE_ID_EXAMPLE);
}

The method getCommandName() would look like this now, with the string extracted into a constant:

	/***
	 * Return the command
	 * 
	 * (non-Javadoc)
	 * 
	 * @see com.ibm.js.team.workitem.commandline.framework.IWorkItemCommand#getCommandName()
	 */
	@Override
	public String getCommandName() {
		return COMMAND_MIGRATE_ENUMERATION_LIST_ATTRIBUTE;
	}

Add The New Command to the Main Class

The new command needs to be added to the WorkItem Command Line. In the class WorkitemCommandLine add it to the method method addSupportedCommands() like shown below.

/**
 * Add the supported commands. If introducing a new command, add it here.
 * 
 * @param parameterManager
 */
private void addSupportedCommands(ParameterManager parameterManager) {
	addSupportedCommand(new PrintTypeAttributesCommand(
			new ParameterManager(parameterManager.getArguments())));
	addSupportedCommand(new CreateWorkItemCommand(new ParameterManager(
			parameterManager.getArguments())));
	addSupportedCommand(new UpdateWorkItemCommand(new ParameterManager(
			parameterManager.getArguments())));
	addSupportedCommand(new MigrateWorkItemAttributeCommand(new ParameterManager(
			parameterManager.getArguments())));
}

Now it can be used like shown below. It is also possible to start debugging it using Launches.

wcl -migrateattribute /ignoreErrors repository="https://clm.example.com:9443/ccm" user=ralph password=ralph projectArea="JKE Banking (Change Management)" workItemType=task sourceAttributeID=custom.medium.string targetAttributeID=custom.enumeration.list

or this

wcl -migrateattribute /ignoreErrors repository="https://clm.example.com:9443/ccm" user=ralph password=ralph projectArea="JKE Banking (Change Management)" workItemType=task  id=275 sourceAttributeID=custom.medium.string targetAttributeID=custom.enumeration.list

Implementing the Command Logic

Now the method process() needs to be implemented. It orchestrates the work to be done. This obviously took some iterations. Here is the final result.

/***
 * Perform the command
 * 
 * (non-Javadoc)
 * 
 * @see com.ibm.js.team.workitem.commandline.framework.AbstractCommand#process()
 */
@Override
public OperationResult process() throws TeamRepositoryException {
	// From CreateWorkItemCommand
	// Get the parameters such as project area name and Attribute Type and
	// run the operation
	String projectAreaName = getParameterManager()
			.consumeParameter(
					IWorkItemCommandLineConstants.PARAMETER_PROJECT_AREA_NAME_PROPERTY)
			.trim();
	// Find the project area
	IProjectArea projectArea = ProcessAreaUtil.findProjectArea(
			projectAreaName, getProcessClientService(), getMonitor());
	if (projectArea == null) {
		throw new WorkItemCommandLineException("Project Area not found: "
				+ projectAreaName);
	}

	String workItemTypeID = getParameterManager().consumeParameter(
			IWorkItemCommandLineConstants.PARAMETER_WORKITEM_TYPE_PROPERTY)
			.trim();
	// Find the work item type
	IWorkItemType workItemType = WorkItemHelper.findWorkItemType(
			workItemTypeID, projectArea.getProjectArea(),
			getWorkItemCommon(), getMonitor());

	// Get the parameter values - The source attribute
	String sourceAttributeID = getParameterManager().consumeParameter(
			PARAMETER_SOURCE_ATTRIBUTE_ID).trim();
	// check if old attribute ID is string type
	IAttribute sourceIAttribute = getWorkItemCommon().findAttribute(
			projectArea, sourceAttributeID, getMonitor());
	if (sourceIAttribute == null) {
		throw new WorkItemCommandLineException(
				"Source Attribute not found: " + sourceAttributeID);
	}
	if (!AttributeTypes.STRING_TYPES.contains(sourceIAttribute
			.getAttributeType())) {
		throw new WorkItemCommandLineException(
				"Source Attribute is not a String type: "
						+ sourceAttributeID);
	}

	// Get the parameter values - The target attribute
	String targetAttributeID = getParameterManager().consumeParameter(
			PARAMETER_TARGET_ATTRIBUTE_ID).trim();
	// check if new attribute ID is EnumerationList
	IAttribute targetIAttribute = getWorkItemCommon().findAttribute(
			projectArea, targetAttributeID, getMonitor());
	if (targetIAttribute == null) {
		throw new WorkItemCommandLineException(
				"Target Attribute not found: " + targetAttributeID);
	}
	if (!AttributeTypes.isEnumerationListAttributeType(targetIAttribute
			.getAttributeType())) {
		throw new WorkItemCommandLineException(
				"Target Attribute is not an EnumerationList: "
						+ targetAttributeID);
	}
	if (getParameterManager().hasSwitch(
			IWorkItemCommandLineConstants.SWITCH_IGNOREERRORS)) {
		setIgnoreErrors();
	}
	String wiID = getParameterManager().consumeParameter(
			IWorkItemCommandLineConstants.PARAMETER_WORKITEM_ID_PROPERTY);
	if (wiID != null) {
		IWorkItem wi = WorkItemHelper.findWorkItemByID(wiID,
				IWorkItem.SMALL_PROFILE, getWorkItemCommon(), getMonitor());
		if (!wi.getWorkItemType().equals(workItemType.getIdentifier())) {
			throw new WorkItemCommandLineException(
					"Work item type mismatch: "
							+ workItemType.getIdentifier() + " specified "
							+ workItemType.getIdentifier());
		}
		migrateSingleWorkItem(wi, sourceIAttribute, targetIAttribute);
	} else {
		// Update all work items of this type.
		migrateAllWorkItems(projectArea, workItemType, sourceIAttribute,
				targetIAttribute);
	}
	// If we got here, we succeeded
	getResult().setSuccess();
	return getResult();
}

What it basically does is to get the parameters needed for this command and work with them. Keep in mind that the abstract class AbstractTeamRepositoryCommand does the login process already. So what needs to be done is to get the project area, the work item type, the source and the target attribute ID and the flags. Most of the code has been harvested in existing commands as well as in the WorkItemHelper class. The methods migrateSingleWorkItem() and migrateAllWorkItems() will be explained in a bit.

Some new fields and getters/setters where introduced in the process. We also need the separator for the literals in the original string later. The code looks as below:

public static final String SEPARATOR_ENUMERATION_LITERAL_ID_LIST = ",";

private boolean fIgnoreErrors = false;

private void setIgnoreErrors() {
	fIgnoreErrors = true;
}

private boolean isIgnoreErrors() {
	return fIgnoreErrors;
}

public MigrateWorkItemAttributeCommand(ParameterManager parametermanager) {
	super(parametermanager);
}

There was also a need to be able to access the ITeamRepository in the MigrateWorkItemAttributeCommand. I introduced a getter into the AbstractTeamRepositoryCommand class for convenience.

Note, it is always possible to get the ITeamRepository from an RTC object using the getOrigin() method and cast it to the ITeamRepository. However, it makes sense to add this to the framework, too.

Implementing the Work Item Modification

The final implementation steps are to implement the missing methods as well as add a inner class extending WorkItemOperation, to do the change to the work item. The code is shown below.

/**
 * Migrate one specific work item - for testing
 * 
 * @param wi
 * @param sourceIAttribute
 * @param targetIAttribute
 * @throws TeamRepositoryException
 */
private void migrateSingleWorkItem(IWorkItem wi,
		IAttribute sourceIAttribute, IAttribute targetIAttribute)
		throws TeamRepositoryException {
	MigrateWorkItem operation = new MigrateWorkItem("Migrate",
			IWorkItem.FULL_PROFILE, sourceIAttribute, targetIAttribute);
	performMigration((IWorkItemHandle) wi.getItemHandle(), operation);
}

/**
 * Migrate all work items of a specific type in a project area
 * 
 * @param projectArea
 * @param workItemType
 * @param sourceIAttribute
 * @param targetIAttribute
 * @throws TeamRepositoryException
 */
private void migrateAllWorkItems(IProjectArea projectArea,
		IWorkItemType workItemType, IAttribute sourceIAttribute,
		IAttribute targetIAttribute) throws TeamRepositoryException {
	// Find all work items of this type.
	// Create an Expression to find them
	IQueryableAttribute attribute = QueryableAttributes.getFactory(
			IWorkItem.ITEM_TYPE).findAttribute(projectArea,
			IWorkItem.PROJECT_AREA_PROPERTY, getAuditableCommon(),
			getMonitor());
	IQueryableAttribute type = QueryableAttributes.getFactory(
			IWorkItem.ITEM_TYPE).findAttribute(projectArea,
			IWorkItem.TYPE_PROPERTY, getAuditableCommon(), getMonitor());
	Expression inProjectArea = new AttributeExpression(attribute,
			AttributeOperation.EQUALS, projectArea);
	Expression isType = new AttributeExpression(type,
			AttributeOperation.EQUALS, workItemType.getIdentifier());
	Term typeinProjectArea = new Term(Term.Operator.AND);
	typeinProjectArea.add(inProjectArea);
	typeinProjectArea.add(isType);

	// Run the Expression
	IQueryClient queryClient = getWorkItemClient().getQueryClient();
	IQueryResult results = queryClient.getExpressionResults(
			projectArea, typeinProjectArea);
	// Override the result set limit so that we get more than 1000 items if
	// there are more
	results.setLimit(Integer.MAX_VALUE);
	MigrateWorkItem operation = new MigrateWorkItem("Migrate",
			IWorkItem.FULL_PROFILE, sourceIAttribute, targetIAttribute);
	// Run the operation for each result
	while (results.hasNext(getMonitor())) {
		IResult result = (IResult) results.next(getMonitor());
		performMigration((IWorkItemHandle) result.getItem(), operation);
	}
}

/**
 * Perform the update and
 * 
 * @param handle
 * @param operation
 * @throws WorkItemCommandLineException
 */
private void performMigration(IWorkItemHandle handle,
		MigrateWorkItem operation) throws WorkItemCommandLineException {
	String workItemID = "undefined";
	try {
		IWorkItem workItem = getAuditableCommon().resolveAuditable(
				(IWorkItemHandle) handle, IWorkItem.SMALL_PROFILE,
				getMonitor());
		workItemID = getWorkItemIDString(workItem);
		operation.run(handle, getMonitor());
		getResult().appendResultString(
				"Migrated work item " + workItemID + ".");
	} catch (TeamRepositoryException e) {
		throw new WorkItemCommandLineException(
				getResult().getResultString()
						+ "TeamRepositoryException: Work item "
						+ workItemID + " attribute not migrated. "
						+ e.getMessage(), e);
	} catch (WorkItemCommandLineException e) {
		String message = "WorkItemCommandLineException Work item " + workItemID
				+ " attribute not migrated. " + e.getMessage();
		if (!isIgnoreErrors()) {
			throw new WorkItemCommandLineException(getResult().getResultString() + message, e);
		} else {
			getResult().appendResultString(message);
		}
	}
}

The method migrateSingleWorkItem() basically runs the migration operation for a single work item. It creates the inner class MigrateWorkItem with the data it needs and then calls the method performMigration() to perform the migration. The method performMigration() calls the provided method and does all the error handling.

The method migrateAllWorkItems() basically creates an expression to get all work items of the specified type from the project area. The expression is run and performMigration() is performed on one result after the other.

Please note that the line

results.setLimit(Integer.MAX_VALUE);

makes sure that the built in query limit of the Eclipse client is overwritten to allow getting all possible results. To work it has to be exactly at the place it is.

The method performMigration() just performs the call and wraps everything up to be able to process exceptions. The information is provided in the result.

The methods above use some additional methods to get the client library IWorkItemClient to be able to perform the query expression.

/**
 * We need this client libraries to run queries
 * 
 * @return
 */
private IWorkItemClient getWorkItemClient() {
	return (IWorkItemClient) getTeamRepository().getClientLibrary(
			IWorkItemClient.class);
}

/**
 * Get the work item ID as string
 * 
 * @param workItem
 * @return
 */
private String getWorkItemIDString(IWorkItem workItem) {
	return new Integer(workItem.getId()).toString();
}

The WorkItemOperation Implementation

Finally lets look at the inner class MigrateWorkItem which extends WorkItemOperation. I use this approach in all the work item manipulation client API usage, because it conveniently handles all possible mishaps.

private class MigrateWorkItem extends WorkItemOperation {
	
	IAttribute fsourceAttribute = null;
	IAttribute fTargetAttribute = null;
	
	/**
	 * Constructor
	 * 
	 * @param The
	 *            title message for the operation
	 * @param message
	 * @param profile
	 * @param sourceAttribute
	 * @param targetAttribute
	 */
	public MigrateWorkItem(String message, ItemProfile profile,
			IAttribute sourceAttribute, IAttribute targetAttribute) {
		super(message, profile);
		fsourceAttribute = sourceAttribute;
		fTargetAttribute = targetAttribute;
	}
	
	/***
	 * This gets called if run() is called
	 * 
	 * @see com.ibm.team.workitem.client.WorkItemOperation#execute(com.ibm.team
	 *      .workitem.client.WorkItemWorkingCopy,
	 *      org.eclipse.core.runtime.IProgressMonitor)
	 */
	@Override
	protected void execute(WorkItemWorkingCopy workingCopy,
			IProgressMonitor monitor) throws TeamRepositoryException,
			RuntimeException {
	
		IWorkItem workItem = workingCopy.getWorkItem();
		String thisItemID = getWorkItemIDString(workItem);
		if (!workItem.hasAttribute(fsourceAttribute)) {
			throw new WorkItemCommandLineException(
					"Work Item "
							+ thisItemID
							+ " Source Attribute not available - Synchronize Attributes: "
							+ fsourceAttribute.getIdentifier());
		}
		if (!workItem.hasAttribute(fTargetAttribute)) {
			throw new WorkItemCommandLineException(
					"Work Item "
							+ thisItemID
							+ " Target Attribute not available - Synchronize Attributes: "
							+ fTargetAttribute.getIdentifier());
		}
		// get the old value - a string with literals separated by a comma
		Object ovalue = workItem.getValue(fsourceAttribute);
		// compute the result values
		String sourceValues = "";
		if (null != ovalue && ovalue instanceof String) {
			sourceValues = (String) ovalue;
		}
		if (!sourceValues.equals("")) {
			String[] values = sourceValues
					.split(SEPARATOR_ENUMERATION_LITERAL_ID_LIST);
			IEnumeration enumeration = getWorkItemCommon()
					.resolveEnumeration(fTargetAttribute, monitor);

			List results = new ArrayList();
			for (String literalID : values) {
				if (literalID == "") {
					// Nothing to do
					continue;
				}
				Identifier literal = getLiteralEqualsIDString(
						enumeration, literalID);
				if (null == literal) {
					throw new WorkItemCommandLineException("Work Item "
							+ thisItemID
							+ " Target literal ID not available: "
							+ literalID + " Attribute "
							+ fTargetAttribute.getIdentifier());
				}
				results.add(literal);
			}
			// Set the value
			workItem.setValue(fTargetAttribute, results);
		}
		getResult().appendResultString("Migrated work item " + thisItemID);
	}

	/**
	 * Gets an enumeration literal for an attribute that has the specific
	 * literal ID.
	 * 
	 * @param enumeration
	 *            - the enumeration to look for
	 * @param literalIDString
	 *            - the literal ID name to look for
	 * @return the literal or null
	 * @throws TeamRepositoryException
	 */
	private Identifier getLiteralEqualsIDString(
			final IEnumeration enumeration,
			String literalIDString) throws TeamRepositoryException {
		List literals = enumeration
				.getEnumerationLiterals();
		for (Iterator iterator = literals.iterator(); iterator
				.hasNext();) {
			ILiteral iLiteral = (ILiteral) iterator.next();
			if (iLiteral.getIdentifier2().getStringIdentifier()
					.equals(literalIDString.trim())) {
				return iLiteral.getIdentifier2();
			}
		}
		return null;
	}
}

The interesting method here is execute(). It basically checks if the work item has the source attribute and the target attribute. If one of the attributes is missing, it can not run. You have to synchronize attributes first.

As last step the method gets the string value and splits the string into its values. The list of enumeration literal ID’s is then used to look up the enumeration literals. In case a literal can not be found, this is an error. If the literals are retrieved, they are put into a list and finally set as the value for the new attribute.

The method getLiteralEqualsIDString() is actually mostly harvested from the WorkItemHelper class, where it is used with the literal display name.

Additional Changes to the Framework

Since this command works very different than the others, it became apparent that it would be nice to see progress directly, if we are not working in RMI server mode. this also helps the other commands and potential future commands. To provide a better user experience

    • In WorkitemCommandLine the method isServer() has been made public so that it can be read from the framework classes
  • In OperationResult the method appendResultString() was changed to output the information rather than storing it in a result string, if the WorkItemCommandLine does not run in server mode

This change makes the result output much more immediate, especially for long running commands in normal mode. In RMI mode, the data is provided as is, after the call finishes. Some Observations The Parameter handling does not handle optional parameters well. It should be possible to add an optional parameter like the work item ID in this case. However, this is just a minor problem here. In addition at some point it can get so complicated that the automation for printing the command syntax won’t be easily manageable any more. Summary This post explains how to extend the WorkItem Command Line with your own commands. As always, I hope that helps someone out there.

The WorkItem Command Line Explained

This post explains how the WorkItem Command Line works. It explains its structure and the main classes. This should allow users to extend the capabilities the code and add new commands or extend the current commands.

Please note, as this is work in progress, things might change slightly in future versions, however the general structure should persist.

Latest Version

See A RTC WorkItem Command Line Version 3.0 for the latest version.

Related posts

License

The post contains published code, so our lawyers reminded me to state that the code in this post is derived from examples from Jazz.net as well as the RTC SDK. The usage of code from that example source code is governed by this license. Therefore this code is governed by this license. I found a section relevant to source code at the and of the license.

Please also remember, as stated in the disclaimer, that this code comes with the usual lack of promise or guarantee.

On the other hand, you have the code and are able to add your own code to it. It would be nice to know what you did and how, if you do so.

Just Starting With Extending RTC?

If you just get started with extending Rational Team Concert, or create API based automation, start with the post Learning To Fly: Getting Started with the RTC Java API’s and follow the linked resources.

You should be able to use the code attached to this post in the development environment you set up in the Rational Team Concert Extensions Workshop and get your own extensions or automation working there as well.

Importing The Project

Download the code from the post A RTC WorkItem Command Line Version 2. The file with the source code is named WorkItemCommandLine_Project-Vx-YYYYMMDD.zip. The x represents the version number and is followed by the date it was created. The file is an exported Eclipse project.

The project expects the Eclipse workspace to be set up as described in the posts Setting up Rational Team Concert for API Development. It requires the SDK to be set up as well as the Plain Java Client Libraries. The SDK is needed, because the project is a Plugin Project. this is done to be able to use the Eclipse Plugin Development Environment (PDE) to look at the API source code. The Plain Java Client Libraries are needed to run the code a Java application.

Use the Eclipse import File>Import. In the wizard window select “Existing Projects into Workspace” in the section General. Click Next and chose the option “Select archive file”, browse to the file you downloaded and select it. Make sure you see the project com.ibm.js.team.workitem.commandline selected and press Finish to start the import.

After the import you should see the project in your workspace. You should see no errors in the project. If you see errors, the most likely reasons for that are:

  1. The SDK is not set up correctly and the classes can not be resolved
  2. The SDK version is prior to RTC 4.0.1
  3. The Plain Java Client Libraries are not installed or the User Library has a different name

The first two will show in the plugin.xml and the manifest file. Setup the SDK correctly, or change the minimal versions needed in the dependencies.

The third will show as an error in the the build path. Define a user library named PlainJavaApi as explained in  Setting up Rational Team Concert for API Development or remove the existing user library entry and add you own. Make sure the dependency order of SDK and user library are correct as explained in  Understanding and Using the RTC Java Client API.

In case you have other errors you should search the internet for a solution.

Explore the Project

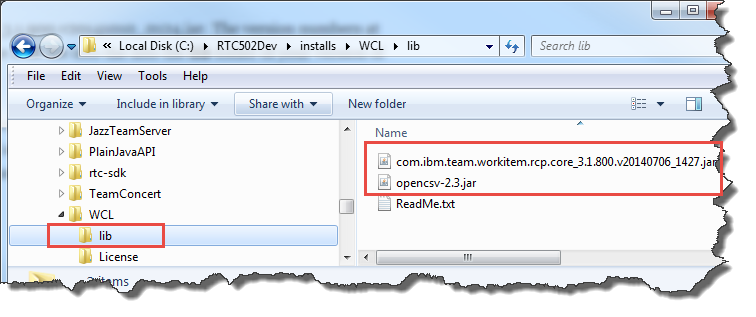
You can now explore the project. The folder structure is shown below.

WCL Project Overview

There are the following files and folders

  • src – contains the source code files.
  • build – contains a jardesc file to build a jar file for packaging
  • Launches – contains launch files used for testing
  • License – contains the license files
  • scripts – contains the script files used to start WCL, as well as a file with help information
  • the root contains a readme file, explaining how to build a releasable version of WCL, scripts used to start WCL in the development setup and a test file for upload attachment tests.

The Source Files

The image below shows the structure of the source code.

Source StructureThe package com.ibm.js.team.workitem.commandline contains the class WirkitemCommandLine, which has the main method to call WCL. The class OperationResult is used to pass result information. This is necessary, since the code could run in RMI mode and the output needs to be transferred to the RMI client. This class needs to support serializing in order to pass the result back. IWorkItemCommandLineConstants contains various constants used by WCL.

The package com.ibm.js.team.workitem.commandline.commands contains the classes that implement the currently available commands. CreateWorkItemCommand creates a work item of a specific type in a specific project area and sets the attributes as provided. PrintTypeAttributesCommand prints the attributes of a specific work item type in a specific project area. UpdateWorkItemCommand finds a work item and updates its attribute values.

The package com.ibm.js.team.workitem.commandline.framework contains a basic framework that is used by commands that are implemented in WCL. The main class requires the interface IWorkItemCommand to run the command. I ended up using this kind of framework, because all commands required some kind of parameters. The command should be able to define the parameters needed. The commands also require to do error handling. To interact with the RTC repository commands also need to login. The framework handles all the common activities and allows to create new commands without having to redevelop all this.

The class AbstractCommand implements the interface IWorkItemCommand and leaves some methods abstract that extending classes need to implement.

The class AbstractTeamRepositoryCommand adds a login to the team repository and the class AbstractWorkItemModificationCommand adds a WorkItemOperation to perform the changes to the work item. WorkItemCommandLineException is the exception class that is used to wrap other exceptions and thrown in case of unrecoverable errors.

The package com.ibm.js.team.workitem.commandline.helper contains helper classes. The class DevelopmentLineHelper is from another blog post Handling Iterations – Automation for the “Planned For” Attribute. It allows to find development lines and iterations on a development line. WorkItemHelper implements modifying work item attribute modification. Most of the RTC API related code is in there. WorkItemTypeHelper helps with printing the attribute information for a work item type.

The package com.ibm.js.team.workitem.commandline.parameter contains classes that implement all the parameter handling needed. The class Parameter is used to describe a parameter, if it is required, if it was already consumed, if it is a switch and the like. ParameterIDMapper defines a list of aliases that can be used instead of an attribute ID. You can add your own aliases that can be used for convenience. ParameterList represents a list of parameters. The class ParameterManager manages a parameter list and provides the central access to the parameters. The class ParameterParser is used to parse the parameters passed from outside and store them in a parameter list.

The package com.ibm.js.team.workitem.commandline.remote contains the remote interface IRemoteWorkItemOperationCall that is used in RMI mode.

The package com.ibm.js.team.workitem.commandline.utils contains some utility classes (providing static methods as interfaces). The class ProcessAreaUtil allows to search process areas. The class SimpleDateFormatUtil helps with conversion of timstamps from and to a string representation.

 How The Code Works

The main method of the WorkitemCommandLine basically instantiates the class and then calls the method run(). We will look at that method later.

/**
 * The main entry point into the work item commandline
 * 
 * @param args
 *            - the arguments to be used by the commandline
 * @throws RemoteException
 */
public static void main(String[] args) {

	OperationResult result = new OperationResult();
	System.out.println("WorkItemCommandLine Version "
			+ IWorkItemCommandLineConstants.VERSIONINFO + "\n");
	WorkitemCommandLine commandline;
	try {
		commandline = new WorkitemCommandLine();
		result = commandline.run(args);
	} catch (RemoteException e) {
		result.appendResultString("RemoteException: " + e.getMessage());
		result.appendResultString(e.getStackTrace().toString());
	}
	System.out.println(result.getResultString());
	if (TeamPlatform.isStarted()) {
		TeamPlatform.shutdown();
	}
	if (!isServer()) {
		// If I am not in server mode, I need to exit and return success or
		// failure
		if (result.isSuccess()) {
			// If the operation was unsuccessful, terminate with an error
			System.exit(0);
		}
		System.exit(1);
	}
}

The operation run() will return a result if it terminates. The information in this result is used to create the exit code to terminate the call.

In case this WCL is started as RMI server, the process can not terminate with System.exit(). It needs to persist registered to the RMI registry. The static method isServer() is used to communicate this information.

The method run() parses the parameters passed. It then checks if it is supposed to run as RMI server or as RMI client. If that is the case it starts the RMI server mode or, uses RMI to call the server as client. If this is a normal run, it calls runCommands() with the parameters that have been parsed.

If started as RMI server, the method startRMIServer() is used to initialize RMI and to register the class to the registry. The method runOperation() is basically the interface that is used to run the command on the server and is called by RMI clients. The method runOperation() parses the parameters and calls runCommands() as well.

The method runCommands() really executes the command requested in the parameters.  The first steps it does is to initialize the data it needs. Then it runs addSupportedCommands() to add the commands that are available.

/**
 * Add the supported commands. If introducing a new command, add it here.
 * 
 * @param parameterManager
 */
private void addSupportedCommands(ParameterManager parameterManager) {
	addSupportedCommand(new PrintTypeAttributesCommand(
			new ParameterManager(parameterManager.getArguments())));
	addSupportedCommand(new CreateWorkItemCommand(new ParameterManager(
			parameterManager.getArguments())));
	addSupportedCommand(new UpdateWorkItemCommand(new ParameterManager(
			parameterManager.getArguments())));
}

Now the method runCommands() gets the command from the Parameter Manager. If there is a command string, it gets the class that implements the command. If there is a command registered for this command string, runCommand() calls the command to validate if the required parameters for it to run are available. If this is the case, runCommand() calls the command and returns the result back.

In all other cases runCommand() prepares a result error and also uses the method helpGeneralUsage() to print a help for the command.

Adding Commands to the WorkItemCommandLine

It is easy to add new commands to the WorkitemCommandLine. You need to implement a new command and add a new entry for it in the method addSupportedCommands().

How Commands Work

Commands have to implement the IWorkItemCommand interface. You should pick one of the abstract classes in the framework and extend them. This makes sure the basic workflow will work. If you command needs to create or modify a work item based on property values, use the class AbstractWorkItemModificationCommand. If you only need to have a repository connection, use the class AbstractTeamRepositoryCommand. In both cases all you need to do really is to override and implement the methods required. There are three things that need to be there.

In the method getCommandName() you need to return the name of the command you implement.

@Override
public String getCommandName() {
	return IWorkItemCommandLineConstants.COMMAND_CREATE;
}

If your command needs additional parameters, override the method setRequiredParameters(). Call the method of the superclass to have it add its required parameters and add your parameters. Here is an example

/*
 * (non-Javadoc)
 * 
 * @see com.ibm.js.team.workitem.commandline.framework.
 * AbstractWorkItemCommandLineCommand#setRequiredParameters()
 */
public void setRequiredParameters() {
	super.setRequiredParameters();
	// Add the parameters required to perform the operation
	// getParameterManager().syntaxCommand()
	getParameterManager()
			.syntaxAddRequiredParameter(
					IWorkItemCommandLineConstants.PARAMETER_PROJECT_AREA_NAME_PROPERTY,
					IWorkItemCommandLineConstants.PARAMETER_PROJECT_AREA_NAME_PROPERTY_EXAMPLE);
	getParameterManager()
			.syntaxAddRequiredParameter(
					IWorkItemCommandLineConstants.PARAMETER_WORKITEM_TYPE_PROPERTY,
					IWorkItemCommandLineConstants.PARAMETER_WORKITEM_TYPE_PROPERTY_EXAMPLE);
	getParameterManager().syntaxAddSwitch(
			IWorkItemCommandLineConstants.SWITCH_IGNOREERRORS);
	getParameterManager().syntaxAddSwitch(
			IWorkItemCommandLineConstants.SWITCH_ENABLE_DELETE_ATTACHMENTS);
	getParameterManager().syntaxAddSwitch(
			IWorkItemCommandLineConstants.SWITCH_ENABLE_DELETE_APPROVALS);
}

Parameters added with syntaxAddRequiredParameter() will be assumed to be required. If they are not available the command line will show an error during the parameter validation. The error message is automatically created from the parameter information provided here.

Finally you have to override and implement the method process() to implement the command.

/*
 * (non-Javadoc)
 * 
 * @see com.ibm.js.team.workitem.commandline.framework.
 * AbstractWorkItemCommandLineCommand#process()
 */
@Override
public OperationResult process() throws TeamRepositoryException {
	// Get the parameters such as project area name and Attribute Type and
	// run the operation
	String projectAreaName = getParameterManager()
			.consumeParameter(
					IWorkItemCommandLineConstants.PARAMETER_PROJECT_AREA_NAME_PROPERTY)
			.trim();
	// Find the project area
	IProjectArea projectArea = ProcessAreaUtil.findProjectArea(
			projectAreaName, getProcessClientService(), getMonitor());
	if (projectArea == null) {
		throw new WorkItemCommandLineException("Project Area not found: "
				+ projectAreaName);
	}

	String workItemTypeID = getParameterManager().consumeParameter(
			IWorkItemCommandLineConstants.PARAMETER_WORKITEM_TYPE_PROPERTY)
			.trim();
	// Find the work item type
	IWorkItemType workItemType = WorkItemHelper.findWorkItemType(
			workItemTypeID, projectArea.getProjectArea(),
			getWorkItemCommon(), getMonitor());
	// Create the work item
	createWorkItem(workItemType);
	return this.getResult();
}

To complete the code of this command, here is the method that creates the work item and uses the parameters to update the attributes.

/**
 * Create the work item and set the required attribute values.
 * 
 * @param workItemType
 * @return
 * @throws TeamRepositoryException
 */
private boolean createWorkItem(IWorkItemType workItemType)
		throws TeamRepositoryException {

	ModifyWorkItem operation = new ModifyWorkItem("Creating Work Item");
	this.setIgnoreErrors(getParameterManager().hasSwitch(
			IWorkItemCommandLineConstants.SWITCH_IGNOREERRORS));
	IWorkItemHandle handle;
	try {
		handle = operation.run(workItemType, getMonitor());
	} catch (TeamOperationCanceledException e) {
		throw new WorkItemCommandLineException("Work item not created. "
				+ e.getMessage(), e);
	}
	if (handle == null) {
		throw new WorkItemCommandLineException(
				"Work item not created, cause unknown.");
	} else {
		IWorkItem workItem = getAuditableCommon().resolveAuditable(handle,
				IWorkItem.SMALL_PROFILE, getMonitor());
		this.appendResultString("Created work item " + workItem.getId()
				+ ".");
		this.setSuccess();
	}
	return true;
}

In case you wonder where the actual work gets done – I wondered looking at it. The line

handle = operation.run(workItemType, getMonitor());

does all the work. By calling it this way, the WorkItemOperation creates the work item. The operation is based upon the code in the class AbstractWorkItemModificationCommand.

In that class, the execute() method is overwritten with this code:

/*
 * This is run by the framework
 * 
 * (non-Javadoc)
 * 
 * @see
 * com.ibm.team.workitem.client.WorkItemOperation#execute(com.ibm.team
 * .workitem.client.WorkItemWorkingCopy,
 * org.eclipse.core.runtime.IProgressMonitor)
 */
@Override
protected void execute(WorkItemWorkingCopy workingCopy,
		IProgressMonitor monitor) throws TeamRepositoryException,
		RuntimeException {
	// run the special method in the execute.
	// This is called by the framework.
	update(workingCopy);
}

The call to the method update() does the real work. It walks through all the unconsumed parameters in the parameter list – which should contain the attributes and values to be set and applies the changes to the work item.

/**
 * This operation does the main task of updating the work item
 * 
 * @param workingCopy
 *            the workingcopy of the workitem to be updated.
 * 
 * @throws RuntimeException
 * @throws TeamRepositoryException
 */
public void update(WorkItemWorkingCopy workingCopy)
		throws RuntimeException, TeamRepositoryException {

	ParameterList arguments = getParameterManager().getArguments();

	// We use a WorkItemHelper to do the real work
	WorkItemHelper workItemHelper = new WorkItemHelper(workingCopy,
			arguments, getMonitor());

	// Run through all properties not yet consumed and try to set the values
	// as provide
	for (Parameter parameter : arguments) {
		if (!(parameter.isConsumed() || parameter.isSwitch() || parameter
				.isCommand())) {
			// Get the property ID
			String propertyName = parameter.getName();
			// Get the property value
			String propertyValue = parameter.getValue();
			try {
				workItemHelper.updateProperty(propertyName, propertyValue);
			} catch (WorkItemCommandLineException e) {
				if (this.isIgnoreErrors()) {
					this.appendResultString("Exception! " + e.getMessage());
					this.appendResultString("Ignored....... ");
				} else {
					throw e;
				}
			} catch (RuntimeException e) {
				this.appendResultString("Runtime Exception: Property "
						+ propertyName + " Value " + propertyValue + " \n"
						+ e.getMessage());
				throw e;
			} catch (IOException e) {
				this.appendResultString("IO Exception: Property "
						+ propertyName + " Value " + propertyValue + " \n"
						+ e.getMessage());
				throw new RuntimeException(e.getMessage(), e);
			}
		}
	}
}

The Class WorkItemHelper

This class is basically doing all the work related to modifying work item data. The helper needs to be instantiated. Then the method updateProperty() can be called.

public void updateProperty(String propertyID, String value)
		throws TeamRepositoryException, WorkItemCommandLineException,
		IOException {
.
.
.
}

The method checks if the attribute is one of the special ones like the type, or complex attributes such as workflow or state changes, approvals or other pseudo attribute ID’s and handles these if detected. Otherwise it calls the method updateGeneralAttribute() to handle the update.

private void updateGeneralAttribute(ParameterValue parameter,
		List exceptions) throws TeamRepositoryException,
		WorkItemCommandLineException {
.
.
.
}

The method updateGeneralAttribute() checks if this attribute is actually available on the work item. If so it calls getRepresentation() to get a value that can be set for the attribute.

private Object getRepresentation(ParameterValue parameter,
		List exceptions) throws TeamRepositoryException,
		WorkItemCommandLineException {
.
.
.
}

The method getRepresentation() basically is a huge list of checks to narrow down what type the attribute to modify is. If the type is narrowed down, it calls a related methods to parse the input data and to create a value for the attribute, that can be returned and set.

Summary

This post explains how the code works and how you can utilize it to implement your own commands. As always, I hope that helps someone out there.

While creating this post, I realized, that I should have named some of the classes differently. This framework is not only good for a work item command line. This code could be used for any command line. Maybe I will adjust this a bit in later versions, should time permit.