WorkItem Command Line and RTC/EWM Extensions Workshop for 7.0.2 SR1

Work Item Command Line for 7.0.2 SR1

The Workitem Command Line had dependencies to the plain Java Client Libraries, including to Log4J1 in a few places. This breaks the Work Item Command Line for IBM Engineering Lifecycle Management 7.0.2 SR1 especially IBM Engineering Workflow Management 7.0.2 SR1 (EWM). WCL 5.3.1 and earlier will not work with the 7.0.2 SR1.

It was requested to support 7.0.2 SR1 with the WorkItem Command Line. I had a look and was able (I think) to update the code of the WCL to work with the new Plain Java Client Libraries. This removes the dependencies to Log4J1 and change the functionality to use Log4J2. The code is on a different branch named Log4j2, because it is incompatible with previous versions of EWM. A new pre-release was created and is available here as Work Item Command Line 6.0 prerelease. I have only done minimal testing. If you have an opportunity to run it, please report issues.

EWM/RTC Extensions Workshop for 7.0.2 SR1

To be able to perform the updates I had to perform (most parts of) Lab 1 of the Rational Team Concert Extensions Workshop. The workshop still works. There are some smaller issues and here is my erratum so far.

  • I downloaded Eclipse IDE 2022-06 R and installed EWM into it. Unfortunately there is an issue when connecting to the EWM server. The error is “Could not get value of field private transient sun.util.calendar.BaseCalendar$Date java.util.Date.cdate in 2022-07-31 09:37:08.301”. Here is an approach how that can be solved.
  • When adding the plugins to the search path the UI has changed and the menu item in the Eclipse version above is named “Add to Java Workspace Scope”.
  • When trying to create the Test Database with the JUnit launch, the test ran out of memory. I increase the memory settings in the launch.

Summary

The changes to the ELM 7.0.2 SR1 break the Workitem Command Line and require a new setup of the Extensions workshop to develop extensions. The WorkItem Command Line is available as a prerelease for ELM 7.0.2 and the Extensions Workshop seems to be working with minor limitations.

EWM/RTC Plain Java Client Libraries and Maven

I have worked with Maven applications using the RTC Plain Java Client libraries often recently. It has not always been fun, I have been struggling with Maven. I have been struggling with the Plain Java Client Libraries and Maven interacting. In this bog, I will try to share some things I have learned over the time, and recently, that you can use when working with Maven, especially in the context of EWM/RTC automation using the Plain Java Client Libraries.

Maven basics

How to install Maven is documented in this link. I do not intent to rewrite this documentation. I just want to emphasize some things that I always run into.

  1. Using Maven, requires a Java JDK. A JRE is not sufficient. Where to download a valid, supported, IBM JDK, is explained below.
  2. When using Maven in the command line, make sure to have the JAVA_HOME set to the correct JDK.
  3. When using Maven in the command line, make sure to have Maven added to the path.
  4. When using Maven with the Eclipse IDE, make sure to have an up to date Maven installed. I usually download the recent version, install it to work with a command line and then add that install to Eclipse.
  5. When using Maven with the Eclipse IDE, there is still the need to have a compatible JDK configured. Make sure to go to Preferences>Java>Installed JRE’s, add the JDK and set it as active. Then go to Preferences>Java>Installed JRE’s>Execution Environments configure an environment with the JDK. E.g. JavaSE-1.8 for EWM 7.0.x.
  6. When using Maven for a project in an Eclipse IDE right click on the project
    1. Use Maven>Update Project to make sure Eclipse is configured correctly.
    2. Use Run As>Maven clean on the Project or the pom.xml.
    3. Use Run As>Maven install on the Project or the pom.xml.
    4. Sometimes the Eclipse build mechanism seems to be in conflict with Maven, Project>Clean might help.
  7. Sometimes weird things happen. Run maven with -e or -X to see more details.
  8. Sometimes weird things happen, if all fails, consider to delete the local repository folder in the .m2 folder in your user directory.

Maven and the EWM Plain Java client libraries

When working with EWM/RTC automation based on the plain java client libraries, it is possible to download a valid, supported, IBM JDK on the same page where the Plain Java Client Libraries are hosted. When working with EWM/RTC and the Plain Java Client Libraries, the items below show the most important files to download to work with the Plain Java Client Libraries. To get them go to the All downloads tab for the version required. As an example for EWM 7.0.2 go to https://jazz.net/downloads/workflow-management/releases/7.0.2?p=allDownloads.

  1. Get the 10-Free Developers License Activation Kit. Scroll down to the section License Keys and download the 10-Free Developers License Activation Kit. It is very useful to run EWM test systems.
  2. Get the Client for Eclipse. Scroll to the Plain .zip Files section. Download the Client for Eclipse for your architecture.
  3. Get the plain Java Client Libraries. In the Plain .zip Files section download the Plain Java Client Libraries and the API documentation.
All Downloads page

The JDK

The download for the EWM Client for Eclipse contains the required JDK in the folder jazz/jdk. Unpack the EWM client and use the JDK for your development with the Eclipse Client Libraries and Maven.

The trouble with Maven and the Plain Java Client Libraries.

Unfortunately there is no Maven library for the Plain Java Client Libraries. This is a problem, because there is no real good solution (that I could find) to work with Maven and libraries that do not have a maven repository.

In some projects, I was able to get away with working with Maven and the Plain Java Client Libraries, using an Eclipse User Library with the Plain Java Client Libraries. This works, if at all, only in the Eclipse IDE.

In a recent project this solution was not manageable. I was unable to compile, or I was able to compile, but running the application failed with class not found exceptions. I got it working on my laptop, but we were unable to get it working for a colleague. We lost days.

My usual strategy of using <put your most popular internet search engine here> to find solutions did not really help. Solutions that I found where cryptic, not understandable and/or did not work.

Packaging the Plain Java Client Libraries as local Maven repository.

I finally found this script https://github.com/cokeSchlumpf/mvn-rtc-java-api that allows packaging the plain java client libraries as a maven repository and include that in the application POM file. This allows shipping the Plain Java Client Libraries as Maven repository with the application and its code to be able to run Maven in Eclipse as well as on the command line.

Although the script finally was a life saver, I had some tough learning to get things right. The main issue was that it is a Bash script and my Windows system does not Bash. I tried installing Cygwin64 but realized that I would have to install all kind of stuff to get that working. As I had recently done some other EWM and containerization related work on my NAS, I ended up setting up the required Maven and JDK on my NAS system. I was able to run the script from there 7Zip the result and upload it to my development environment.

In my first attempt, unfortunately, I did not pay enough attention to the format of the dependencies. The dependencies to external libraries has the format <groupId>:<artifactId>:<version>.

# 6.0.2
export DEPENDENCIES="org.apache.james:apache-mime4j:0.6 commons-io:commons-io:1.2 org.apache.httpcomponents:httpclient:4.5 org.apache.httpcomponents:httpclient-cache:4.5 org.apache.httpcomponents:httpclient-win:4.5 org.apache.httpcomponents:httpcore:4.4.1 org.apache.httpcomponents:httpcore-ab:4.4.1 org.apache.httpcomponents:httpcore-nio:4.4.1 org.apache.httpcomponents:httpmime:4.5"

For whatever reason I did not realize that and only provided the <groupId>. This creates an invalid repository. The symptom is the warning message ‘The POM for …. is invalid, transitive dependencies (if any) will not be available’. It took a while to figure out what the reason was. I ended up recreating the repository using the following dependencies values for 7.0.1:

# 7.0.1
export DEPENDENCIES="org.apache.james:apache-mime4j:0.6 commons-io:commons-io:1.2 org.apache.httpcomponents:httpclient:4.5.6 org.apache.httpcomponents:httpclient-cache:4.5.6 org.apache.httpcomponents:httpclient-win:4.5.6 org.apache.httpcomponents:httpcore:4.4.10 org.apache.httpcomponents:httpcore-ab:4.4.10 org.apache.httpcomponents:httpcore-nio:4.4.10 org.apache.httpcomponents:httpmime:4.5.6"

It is totally possible that some of my attempts to fix the above problem made things more miserable. I just realized the severity of the issue when I merged my projects to one and still had the problem.

Please note, if you follow the script above, provide the repository and change the pom of your application and run

mvn clean install

the repository is copied into the local maven repository on your machine. It is stored in the user directory in the folder

.m2/repository/com/ibm/rtc/rtc-java-api

If you build a new version of the repository, make sure to delete the folder above, to make sure your new version is actually installed. Maven does not recognize a difference and will not replace the local files on its own. The reason is that there is no version change visible in the data. This holds true also for the machines of your fellow developers. So when recreating a new Plain Java Client Libraries maven repository with the script, make sure to delete the old local maven repository for the library rtc-java-api in you local .m2 folder as explained above. Then run

mvn clean install

This will recreate the maven library.

I finally succeeded with running

# 7.0.1
export DEPENDENCIES="org.apache.james:apache-mime4j:0.6 commons-io:commons-io:1.2 org.apache.httpcomponents:httpclient:4.5.6 org.apache.httpcomponents:httpclient-cache:4.5.6 org.apache.httpcomponents:httpclient-win:4.5.6 org.apache.httpcomponents:httpcore:4.4.10 org.apache.httpcomponents:httpcore-ab:4.4.10 org.apache.httpcomponents:httpcore-nio:4.4.10 org.apache.httpcomponents:httpmime:4.5.6"

./setup-repo.sh -l ./libs-7.0.1 -r ./repo -d "${DEPENDENCIES}" -v 7.0.1

I followed the readme and added the following to my pom.xml

	<!-- The maven dependency for the EWM Plain Java Client Libraries provided in a local repository -->
		<dependency>
			<groupId>com.ibm.rtc</groupId>
			<artifactId>rtc-java-api</artifactId>
			<version>7.0.1</version>
			<type>pom</type>
		</dependency>

and the repository:

<!-- The maven repository for the EWM Plain Java Client Libraries -->
<repositories>
    <repository>
        <id>project-repo</id>
        <releases>
            <enabled>true</enabled>
            <checksumPolicy>ignore</checksumPolicy>
        </releases>
        <snapshots>
            <enabled>true</enabled>
        </snapshots>
        <url>file://${project.basedir}/repo</url>
    </repository>
</repositories>

The location is based on a project property:

		<project.basedir>${basedir}</project.basedir>

So the files of the repository where copied and located in my Eclipse project in the folder repo in the project root folder.

The repository is bundled in the folder repo

Now it is possible to run Maven from within Eclipse as well as on the shell/command line and my project cleans, installs and liberty:run and the warning mentioned above is gone.

I can only suggest to use the mvn-rtc-java-api – Simple setup RTC Java Client API for Maven project. I would like to thank Victor and Michael for their great contribution. I can only suggest to use it for your purposes.

Whats Next?

I am a bit hesitant to use my personal NAS system as an extended Linux system for development. I will see if I can find some time to understand what the application does in detail and maybe rewrite it in Python. That would make it more operating system independent and allow broader usage.

Summary

As always, I hope that this post helps users out there to achieve their goal and saves some hours of work.

Work Item Command Line 4.3

I worked with a colleague on the Work Item Command Line who was adding a feature for usage with a customer. That colleague had also done some changes related to availability and performance running queries. These changes where merged back into the code. WCL was missing some capabilities that I always wanted to have. I had a quick look to understand how much effort hat would be and took the opportunity to implement these capabilities on the way. While doing so, some small enhancements where added and some defects where found and fixed. All that needed to be published as a new version of WCL.

Print a work item

New in Version 4.3

The latest release 4.3 is available here and has the following changes:

  • Readme.md updated
  • Readme documents for deployment in source code updated
  • Refactored the capability to create a string representation for a work item attribute, link or pseudo attribute (e.g. attachments) into a helper class WorkItemExportHelper
  • Migrated -exportworkitems to use the new helper class WorkItemExportHelper
  • Several fixes in -exportworkitems to
    • Enable error handling and make suppressing errors work
    • Introduce a new flag that exports all supported columns and links
    • If exporting all columns, order the attributes and links (except ID, Type and Summary that are by default at the beginning)
    • Checked functionality with newest OpenCSV
    • Refactoring class to make maintenance easier
  • Added a new command -printworkitem that prints the attributes, attachments and supported links of a work item
    • Using the WorkItemExportHelper and its capabilities
    • Also provides switch to print all attributes and links ordered as above
    • Exports the attachments to a provided folder
  • Added a new command -printtypeattributes that allows to get the attribute Id’s and Display Names for a given work item type in a project area
  • Added a command -validateoslclinks that validates OSLC links and their back links in other applications fixing missing back links
  • External library dependencies are added without a version number to allow newer versions

Disclaimer

Please keep in mind that the information in this blog is “as is”, unsupported, and may be outdated or inaccurate.

The Work Item Command Line (WCL) is not an officially supported application.

For information on released products, consult the product documentation, support tech notes, and the Jazz.net library.

Open Items

Some of the API used in the Work Item Command Line becomes deprecated.

  • Some changes especially for -importworkitems needed for versions of RTC e.g. 6.0.5 and later
    • These will likely not work with earlier versions of RTC
    • if you need that either try an earlier version of WCL such as 4.0 or 4.1 or open an issue and I could look into a backport
  • The Linking API in RTC has evolved and deprecates some API used in WCL
  • OpenCSV has evolved and newer versions deprecates some API used in WCL
    • OpenCSV requires a new library commons-lang3-3.1.jar
  • Migration to Maven might be something to consider

This is all not problematic yet, but needs to be addressed sooner or later.

License

WCL is released under the MIT License. See the License.txt and the license headers in the individual files.

Compatibility

This code has been used with RTC 4.x, 5.x  and 6.x with no or minimal changes and it is pretty safe to assume, that the code will work with newer versions of RTC to come.

An exception is the -importworkitems command that requires a library to use a mapping file. The capability to use the mapping file was moved into the plain Java Client libraries in RTC 6.0.5 as an internal class. To support work item import with the mapping moved to the Plain Java Client Libraries as internal API, the imports in ImportWorkItemsCommand where changed and the file com.ibm.team.workitem.rcp.core*.jar was removed from the jar file dependencies in the build path.

See Restore Compatibility to 6.0.4 and before for how to switch this back.

The code requires the RTC Plain Java Client Libraries.

The Export and import commands require additional external libraries that need to be downloaded and installed separately. See the document below.

Restore Compatibility to 6.0.4 and older

To support 6.0.5 and beyond the imports in ImportWorkItemsCommand where changed from:

com.ibm.team.workitem.rcp.core.internal.bugzilla.mappers.BugzillaMapping*

to: com.ibm.team.workitem.common.internal.importer.bugzilla.mappers.BugzillaMapping*

and the file com.ibm.team.workitem.rcp.core*.jar was removed from the jar file dependencies in the build path.

Follow the description in the sections beginning with Downloads how to get and rebuild the code. The steps in this section below are required to port WCL back to RTC 4.0.4 and earlier:

The original imports have been put back in past 4.0.3, but commented out. To enable the mapping for earlier versions of RTC, replace the imports *BugzillaMapping* with the versions commented out. Then add the com.ibm.team.workitem.rcp.core_*.jar file back in to the build path and add the required JAR file as below

From Work Item Command Line 4.1

The import commands of WCL can only provide the capability to use a mapping file by using a JAR file that only ships with the RTC Eclipse client and the SDK. The classes used for the mapping file capability are located in the library com.ibm.team.workitem.rcp.core.  Open the Install location of the RTC Eclipse client and search for com.ibm.team.workitem.rcp.core*. You should find a file names similar to this one: com.ibm.team.workitem.rcp.core_3.1.900.v20141010_0124.jar. The version numbers at the end could be different. Copy the JAR file into the into the libfolder of your version of WCL.

Download

The latest code can be downloaded from this GIT repository. The latest releases can be downloaded from here

There are different ways to download.

  • The easiest is to download the latest code as a zip file using the button Clone or download.
    • Use the option Download ZIP to download the code as ZIP file. Once the download finishes, browse the folder structure of the ZIP file. The top level contains the README.md file. An Eclipse project is contained in the folder com.ibm.js.team.workitem.commandline. This project can be used to develop the code and to generate an executable.
    • It is also possible to clone the repository and import the project using GIT. Clone the GIT project to your local file system. This requires GIT or some GIT GUI to be installed. How to use GIT is out of the scope of this blog. See the help how to set up GIT and how to use it with Eclipse.
  • It is also possible to download releases from the releases page. The zip code made available is in the same format as the one above can be used as described above. Note that the releases might be older, and there might be no release available for the latest code version.

See below how to import the enclosed project into Eclipse.

Some releases might contain a prepackaged executable for convenience e.g. named wcl-V4.3-20190117.zip. See the section Deploying the packaged application below for how to use this form of packaging. Please note that the prepackaged executable might not be available for all versions. The following sections explain how to create this executable. See the section Packaging the application for shipping for how to perform the packaging.

Prerequisites

Install a current Eclipse or RTC Eclipse client.

Install a current Java 1.8 JRE or Java 1.8 JDK set it as active in Eclipse as Installed JRE and Execution Environment.

Getting the code, install and deploy

Once you have installed such an environment do the following

Import the Code

  • Open the Java Perspective in Eclipse.
  • Import the project into Eclipse from the file system.
    • To import the ZIP file use File>Import, select Existing Projects into Workspace. Click Select archive file, browse to and select the ZIP file you downloaded. Import the enclosed Eclipse project com.ibm.js.team.workitem.commandline.
    • To import the GIT repository use the GIT perspective to add the local cloned repository and then import the
      project com.ibm.js.team.workitem.commandline.

Create a User Library for the Plain Java Client Libraries

  • Use Window>Preferences>Java>BuildPath>User Libraries and add a user library named PlainJavaApi .
  • Add the JAR files of the Plain Java Client Libraries for the version of RTC you are using.

Download and Install openCSV

Download and Install Apache commons-lang

Check the project and recompile

  • Select Project>Clean and clean the project that was just imported.
  • There should be no compiler errors or issues with the classpath

The project should now have built and compiled and show no errors.

Building the WCL or extract from a Release

Follow the description in the file ReadMe – HowToRelease.txt in the root folder of the project

  • To create a wcl.jar file
  • To crate a WCL/lib folder
  • To provide batch and license files

Follow the description in the file /lib/ReadMe.txt in the lib folder of the project

  • To provide the required libraries in the WCL/lib folder

Select the folder, for example C:\Temp\wcl\ and compress the file

  • Rename the archive file to wcl-Vx-YYYYMMDD.zip,
    where YYYY is the year, MM is the month and DD is the day
  • The file is now ready for publishing

Use the file wcl-Vx-YYYYMMDD.zip for shipping similar to the next section.

Deploying the packaged application

Assume a file was created following the steps above and the file is called
wcl-V4.3-20190117.zip. This binary contains WCL as JAR file and other information such as licenses and Readme files. It also contains script files to set the environment and run the Jar File.

The folder lacks libraries needed to execute that need to be provided.

To deploy from this file, create a new folder as deploy location for the automation prototype. In the description here we use C:\temp. It is possible to use any other folder. In this case replace the folder in the this description by the folder you chose.

Extract the binary wcl-V4.3-20190117.zip file into the location C:\temp. There should now be a folder C:\temp\WCL. The folder among others contains the files wcl.jar, wcl.bat, wcl.sh.

Get the libraries as described in Download and Install openCSV and Download and Install Apache commons-lang above, and rename them as described in /lib/ReadMe.txt.

Check the script file and make sure to provide a valid path to a folder containing the unzipped Plain Java Client Libraries and a recent Java 1.8 is available over a Java_Home.

Call WCL using the script files or call it as Jar File as described in said script files.

Just starting with extending RTC?

If you just get started with extending Rational Team Concert, or create API based automation, start with the post Learning To Fly: Getting Started with the RTC Java API’sand follow the linked resources.

You should be able to use the following code in this environment and get your own automation or extension working.

Summary

This is only the first blog. I will try to provide a little bit more about the commands and the parameters soon.

As always, I hope this helps users out there. 

Please ask questions on in https://jazz.net/forum/questions/ and tag them rational-team-concert and wcl.

You can create issues in https://github.com/jazz-community/work-item-command-line/issues as well. 

Keep in mind this is off hours work and not officially supported.

Work Item Command Line 4.1

I recently had a chat with a colleague who is trying to automate RTC Work Item creation. As a casual user without administration experience they where wondering how to find the IDs for the work item types to be able to create work items of the types in WCL. Today you must know the ID of the work item and look them up in the administration UI.

I always wanted to add the ability to be able to list the available work item types in WCL, but for whatever reason I never got to searching the API and add it to WCL.  Having some time last week I took the opportunity to finally implement it. This closes a last big gap that WCL left open. Users can now print the work item types and with that information print the attributes available on the work item type.

A small description how to use WCL can be found here. WCL prints a help if the command is omitted. The help information is very long. Make sure to redirect it into a file or increase the shell buffer size.

This post provides the code for the latest version of WCL and also a description how to install WCL.

License

WCL is released under the MIT License. See the License.txt and the license headers in the individual files.

Compatibility

This code has been used with RTC 4.x, 5.x  and 6.x with no or minimal changes and it is pretty safe to assume, that the code will work with newer versions of RTC to come. The code requires the RTC Plain Java Client Libraries. The Export and import commands require additional external libraries that need to be downloaded and installed separately. See the document below.

Download

Source Code for Download

The code is available in the Jazz Community. WCL 4.1 is available in this release.

Project

Additional Download

You can also download the latest version 4.1 here:

Changes

Added a command printtypes to list the work item types available for a project area.

wcl -printtypes repository="https://clm.example.com:9443/ccm" user=ralph password=****** projectArea="JKE Banking (Change Management)"

lists the work item types. The output will look like below:

printtypes

The Type ID is the work item type ID required to set and get work item information. The type category is an additional information to understand if work item types have the same workflow.

Download the Plain Java Client Libraries

WCL requires at least the RTC Plain Java Client Libraries for your version of RTC. To download that, open the All Downloads tab of the RTC version you are interested in. For example https://jazz.net/downloads/rational-team-concert/releases/6.0.5?p=allDownloads and scroll down to the Plain .zip Files section.

PlainJava

Download the RTC Plain Java Client Libraries file.

Use 7Zip and unzip the RTC Plain Java client Libraries download file (for example named RTC-Client-plainJavaLib-6.0.5.zip). Use 7Zips Extract Files command and provide the extraction Path for example C:\RTCWCL\PlainJavaAPI. Remember the location for later.

Optional: Download the Plain Java Client Libraries API documentation and extract it to the same folder you extracted the RTC Plain Java client Libraries download.

How to Install WCL

There are several ways how the WCL can be set up and run. The two main methods are:

  1. As pre-compiled Java e.g in a jar file using a batch file
  2. Using launch files to run or debug in Eclipse

The following sections explain the first method.

Create Packaged Version

To package your own version of WCL for release from the source code, setup your development environment as described in the next section. Then follow the document ReadMe – HowToRelease.txt in the eclipse project com.ibm.js.team.workitem.commandline you can find in the source code to package WCL.

Install Packaged Version

If you download the packaged, executable application latest version 4.1, the download is already packaged and prepared. The downloaded file is compressed and will be named like WCL_V4.1_20180323.zip. Extract the WCL package file e.g. using 7Zip to a folder, for example C:\RTCWCL.

The folders structure should look as below.

WCLCommandLine

Check and Adjust the Script File

To work, the WCL needs a Java JRE or JDK. Open the file wcl.bat or wcl.sh. Provide a JRE or JDK. I Usually use a JRE that comes with the CCM server or a JDK that comes with the Eclipse client. However any compatible JRE should do.

Change the JAVA_HOME variable to point to a location containing a JRE. If needed, remove the path section  JRE from the final call.

BatchFile

If you installed the Plain Java Client Libraries API into a different location, set the variable PLAIN_JAVA to that folder location.

Make sure the files are executable and test WCL e.g. by calling wcl and running one of the commands. For example use the new prittypes command

wcl -printtypes repository="https://clm.example.com:9443/ccm" user=ralph password=****** projectArea="JKE Banking (Change Management)"

Provide Additional Libraries

The export and the import commands of WCL need two libraries that are not shipped with the downloads.

If you use the packaged WCL and want to use the export/import capability follow the steps below to add the required libraries to the folder lib in the folder lib in the WCL folder.

If you use the Eclipse project for WCL and want to use the export/import capability follow the steps below to add the required libraries to the folder lib in the Eclipse project com.ibm.js.team.workitem.commandline.

The export and the import commands of WCL use the Open CSV Library. I had issues with the newer versions of Open CSV that I could not resolve, so this code assumes the version 3.7. Download the version 3.7 from here. Uncompress and untar the the file opencsv-3.7-src-with-libs.tar.gz you downloaded. Look for the folder opencsv-3.7 deploy\ copy the JAR file opencsv-3.7.jar and put it into the lib folder of your version of WCL.

It is possible to use other such libraries like SuperCSV with minor changes to the source code as well.

The import commands of WCL can only provide the capability to use a mapping file by using a JAR file that only ships with the RTC Eclipse client and the SDK. The classes used for the mapping file capability are located in the library com.ibm.team.workitem.rcp.core.  Open the Install location of the RTC Eclipse client and search for com.ibm.team.workitem.rcp.core*. You should find a file names similar to this one: com.ibm.team.workitem.rcp.core_3.1.900.v20141010_0124.jar. The version numbers at the end could be different. Copy the JAR file into the into the lib folder of your version of WCL.

Installing the Source Code

The best approach to develop for the RTC Java APIs is, to setup the development environment based on the RTC SDK . This provides with the source code for the API and allows to search examples. This saves so much time in the long run that saving the effort of setting the SDK makes no sense. So follow the instructions in the next section.

Just starting with extending RTC?

If you just get started with extending Rational Team Concert, or create API based automation, start with the post Learning To Fly: Getting Started with the RTC Java API’s and follow the linked resources.

Importing the Source Code

Get the source code from the Jazz Community. Use Git to clone the project and import the source project into Eclipse. You can also download the source as a zip file and import the project with the other Eclipse Import wizards. Switch to the Java perspective or the Plug in Development perspective.

The project should look as below

SorceProject

The folders contain the information to build the jar file, to run the and debug the code, folder for additional libraries and the scripts to run the Java application from a shell.

The Eclipse project is a Plug-in development project. This trick provides the access to the SDK and the API source code.

Install The Plain Java Client Libraries

The project references the Plain Java Client Libraries and needs them to run.

BuildPath

So the minimum additional step needed to be able to run the WCL for development in Eclipse is to install the RTC Plain Java Client Libraries as a user library.  The Plain Java Client Libraries have already been downloaded and installed. The same folder with the install can be used in the next steps.

Open Windows>Preferences and type “User lib” into the search window.

BuildPath_2

In the Java>Build Path User Libraries click the New… button. Type the name that is alreay referenced: PlainJavaAp. Click OK.

Select the new User Library and click Add External JARs…

BuildPath_3

Browse to the folder containing the Plain Java Client Libraries C:\RTCWCL\PlainJavaAPI in this example. Select all JAR files and click open.

BuildPath_4

The User Library should now contain the libraries.

BuildPath_5

Go back to the section “Provide Additional Libraries” and add the libraries to the folder lib. Make sure the libraries are available. Remove and re add the jar files to the build path if needed.

You should now be able to run or debug the WCL from within Eclipse. The debug configurations shipped with the source code in the Launches folder are now available under the Debug>Debug Configuration section.

Launches

Change the configurations as needed.

To package your own version of WCL for release from the source code, follow the document ReadMe – HowToRelease.txt in the eclipse project com.ibm.js.team.workitem.commandline you can find in the source code to package WCL.

Summary

You should now be able to start working on WCL and enhance it if needed. I hope this document helps the many users out there.

Query Models or how to find stuff with the RTC Java API

Although I have done my share using and blogging about the API there are still a lot of uncharted areas. How can I use the RTC API to find a user by the name? This is a question that came up recently in the forum and is one of many questions, I did not have a good answer until today.

While writing my last post, for whatever reason I started thinking about this question. I decided to have a quick peek and try to find out. As a result this blog post describes how questions like that can be approached with the RTC Java API.

The Problem

The API provided for objects such as contributors, build results and a lot more model elements used in the RTC application is not necessarily the API a human would expect. This is because the API is written to make it easy to develop the tool and not to make it easy for a human to access data. So a question “How do I find a user by the name” is not necessarily something the RTC API would be optimized for.

If a user logs into RTC, they provide the ID and not the name. After login the user ID is available in the API and that is the glue used for almost all internal computation. The user name is usually nothing of interest to the API. However there are cases, for example integration scenarios, where questions like this might be of interest. So how does RTC solve this under the covers?

Work Item Queries

Please don’t confuse the Query Models in this post with work item queries and work item expressions. To search for work items see

License

The post contains published code, so our lawyers reminded me to state that the code in this post is derived from examples from Jazz.net as well as the RTC SDK. The usage of code from that example source code is governed by this license. Therefore this code is governed by this license. I found a section relevant to source code at the and of the license. Please also remember, as stated in the disclaimer, that this code comes with the usual lack of promise or guarantee. Enjoy!

Just starting with extending RTC?

If you just get started with extending Rational Team Concert, or create API based automation, start with the post Learning To Fly: Getting Started with the RTC Java API’s and follow the linked resources.

You should be able to use the following code in this environment and get your own automation or extension working.

Compatibility

This code has been used with RTC 6.0 and is prepared to be used with RTC 6.0.x with no changes and it is pretty safe to assume, that the code will work with newer versions of RTC. It should however run with any version of RTC that has the specific API already implemented. The code shown below should work with almost all versions of RTC.

The post shows client, common and server API that are available in the RTC Server SDK and the RTC Plain Java Client Libraries.

Download

You can download the Eclipse project with the examples.  Please note, there might be restrictions to access Dropbox and therefore the code in your company or download location.

Solution

RTC works against a database. Some domains such as work items and SCM provide higher level query mechanisms to support user configurable queries in the UI to find stuff. Other domains do not.  But under the cover, the RTC API provides query mechanisms to query the database for data and to manage result sets.

The RTC API provides a common query service and  query models to be able to define and run queries for a wide variety of RTC objects.  The query service and the query models are common API and can be used in Java client applications, Eclipse client extensions as well as in RTC Server extensions.

Although there are questions and examples in the forums and there are some examples like this wiki page and somewhat hidden in this article (section Querying for Items), there is no good description how this works on a broader level. Needless to say that there is no description how to find the entry points into the API either. This post tries to help as good as possible.

How to find the query models

The best way to approach this is to setup a RTC Development environment by following the getting started post. Thsi means follow Setting up Rational Team Concert for API Development and the Extensions workshop and perform at least lab 1. Now you have an Eclipse with a RTC SDK set up that provides you with searchable example code. Without this environment, it is pretty pointless to try to approach this API.

You can use the naming conventions used while developing RTC to search for the query models. In the Plug-in Development Perspective select the menu Search>Java. Type *QueryModel as search string. Select declarations and the other choices shown below, then click Search.

searchquerymodel

Be patient while the SDK is searched. Dependent on the version of RTC you should finally see a search view similar to the one below.

searchquerymodelresult

Note that more than 960 query modes are found. There might be some duplicates and some might be totally uninteresting but there is obviously an enormous potential to access data in RTC.

If you know the model element interface you are interested in, for example an IBuildResult,you can use these approaches to find the related query model.

You can try to use the Eclipse content assist capability of the Plugin Development Environment (PDE) to find the related query model. Type in the name of the model element without the leading I and append QueryModel to it. To find the query model for IBuildResult, type BuildResultQueryModel. While you type use Ctrl+Space for content assist. The PDE should find the query model class.

contentassistpde

You can also use the search approach from earlier to search for the specific class BuildResultQueryModel with or without using the asterisk.

specificsearch

That way the Eclipse client, if set up correctly, allows to find the query model for the model element interfaces you are interested in.

What is provided by the query models?

The query models allow to define queries, to find model elements related to the query model. The query model provides comparisons, Boolean operations on properties specific to the model elements, sort and filter operations. The queries can be constructed and called with parameters. The queries can then be run using a query service and return a result set that can be further processed.

Example 1: Find the build results related to a specific build definition that are tagged with a specific tag.

Example 2: Find a Contributor by user name.

The entry point of a query model is the ROOT entry of the query model. It allows to instantiate queries against the query model and defines the interfaces available for the specific query model. These interfaces also specify which properties an object has, how to access them and the Boolean and other operations available to operate on this model element.

The image below shows the query model root BuildResultQueryModel.ROOT. It returns an implementation class. The BuildResultQueryModel interface also extends interfaces BaseBuildResultQueryModel and ISingleItemQueryModel.

querymodelroot

The interface BaseBuildResultQueryModel defines which properties the model element IBuildResult exposes in queries.

buildresultquerymodel

ISingleItemQueryModel defines operators such as equals or contained in providing a IPredicate interface.

isingleitemquerymodel

The IPredicate interface provides the interfaces to create the Boolean operations and, or, not.

ipredicate

Given this pattern, it is possible to create complex expressions.

Using the query models

Using the Query mechanism typically works in the following steps.

Create a query for the QueryModel for the model element (example [ModelElementName]=BuildResult.

IItemQuery query = IItemQuery.FACTORY.newInstance([ModelElementName]QueryModel.ROOT);

Create a predicate to filter the results based on some properties. This specific example uses a parameter of type string that gets a value passed. Instead of the paramter, it would also be possible to hard code a string here.

IPredicate predicate = [ModelElementName]QueryModel.ROOT.property()._eq(query.newStringArg());

Use the predicate from the step before as filter for the query.

IItemQuery filtered = (IItemQuery) query.filter(predicate);

Finally use the query service to run the query. Here a parameter of type string is passed to the query. Result sets can be big, so the last parameter is used to pass how many results should be retrieved.

IItemQueryPage page = queryService.queryItems(filtered, new Object[] { "Jerry Jazz"}, 1 );

All this can be as compact as in the following example.

IItemQueryPage page = queryService.queryItems(IItemQuery.FACTORY.newInstance(IterationPlanRecordQueryModel.ROOT), IQueryService.EMPTY_PARAMETERS, IQueryService.DATA_QUERY_MAX_PAGE_SIZE);

Get contributor by user name

Lets look at how the code for this forum question.: “How can I get the contributor for a user if I have the user name and not the ID?”. The code is inspired by very similar code that is used for the RTC Jabber integration.

We are looking for an IContributor. So the looking for the query model seems to be ContributorQueryModel.

First the code creates the query for the ContributorQueryModel. Then it creates a predicate to filter out a contributor with a specified name. The predicate uses an argument for the user name instead of providing the user name already here as string. The predicate is set as filter.

This is plain java client library code. There is no direct access to the com.ibm.team.repository.common.service.IQueryService. To get the IQueryService the code uses a trick. the IQueryService is available from the Implementation Class for ITeamRepository.  The teamRepository object is casted to com.ibm.team.repository.client.internal.TeamRepository. This makes the usage of QueryModels unsupported due to using unsupported internal code.

The IQueryService is indirectly available in some client libraries as well.

ITeamBuildClient buildClient = (ITeamBuildClient) teamRepository.getClientLibrary(ITeamBuildClient.class);
IItemQueryPage queryPage = buildClient.queryItems(query, parameters, IQueryService.ITEM_QUERY_MAX_PAGE_SIZE, monitor);

Once the QueryService is available the query is executed. In the example the user name is passed as a new parameter to the query. The result expects no more than one result.

The paged result is retrieved as list of handles and further processed.

// Create a query for the ContributorQueryModel
final IItemQuery query = IItemQuery.FACTORY.newInstance(ContributorQueryModel.ROOT);
// Create a predicate with a parameter to search for name property  
final IPredicate predicate = ContributorQueryModel.ROOT.name()._eq(query.newStringArg());
// Use the predicate as query filter 
final IItemQuery filtered = (IItemQuery) query.filter(predicate);
// Get the query service. This is a cast to an internal class. Note TeamRepository and not ITeamRepository is casted.
final IQueryService qs = ((TeamRepository) teamRepository).getQueryService();
// Run this ItemQuery. Note, there are also other types of queries qs.queryData(dataQuery, parameters, pageSize)
final IItemQueryPage page = qs.queryItems(filtered, new Object[] { findUserByName }, 1 /* IQueryService.DATA_QUERY_MAX_PAGE_SIZE */);
// Get the item handles if any
final List<?> handles = page.getItemHandles();
System.out.println("Hits: " + handles.size());
if (!handles.isEmpty()) {
	System.out.println("Found user.");
	// Resolve and print the information to the contributor object.
	final IContributorHandle handle = (IContributorHandle) handles.get(0);

Please note that there are various operations available to create the predicate and that the predicate can actually more complex. The code above uses the method

_eq()

to check for an equal string. In this case the match has to be exact.

Another option would be to search with ignore case option. This can be done using the following predicate definition:

final IPredicate predicate = ContributorQueryModel.ROOT.name()._ignoreCaseLike(query.newStringArg());

The complete code can be found below and is available for download. The downloadable code contains the example to search for the user by exact (case sensitive) user name and an example to search for the contributor by e-mai with a case insensitive match.

If the QueryUserByName example class is called with the required parameters like.

"https://clm.example.com:9443/ccm" "myadmin" "myadmin" "John Doe"

the result looks like this, provided the user exists, of course.

executionresult

Differences in the Server API

Server extensions must extend com.ibm.team.repository.service.AbstractService. This allows to use com.ibm.team.repository.service.AbstractService.getService(Class) to get the IQueryService in a server Extension like this:

IQueryService queryService = this.getService(IQueryService.class);

The rest of the API is as described above.

Dynamic Query  Model

There is also a dynamic query model based on the IItemType. It can be created as shown below.

IDynamicItemQueryModel dynamicQueryModel = IBuildResult.ITEM_TYPE.getQueryModel();

From the documentation in the code:

Generally, static query models should be used whenever they are visible and the types/properties are known at compile time. Note also that there are no API contracts regarding dynamic APIs – model objects may change shape, queryable properties, etc.”

So use the static version as described above.

Interesting examples in the SDK

Search for “Owned By” is in com.ibm.team.repository.client.tests.query.ExistsPredicateQueryTests.testExistsPredicateUsingLinks()

The full example code

Please find below the complete code for the RTC Plain Java Client Library version to find a contributor by its user name.

/*******************************************************************************
 * Licensed Materials - Property of IBM
 * (c) Copyright IBM Corporation 2017. All Rights Reserved. 
 *
 * Note to U.S. Government Users Restricted Rights:  Use, duplication or 
 * disclosure restricted by GSA ADP Schedule Contract with IBM Corp.
 *******************************************************************************/
package com.ibm.team.workitem.ide.ui.example;

import java.util.List;

import org.eclipse.core.runtime.IProgressMonitor;
import org.eclipse.core.runtime.NullProgressMonitor;

import com.ibm.team.repository.client.IItemManager;
import com.ibm.team.repository.client.ITeamRepository;
import com.ibm.team.repository.client.ITeamRepository.ILoginHandler;
import com.ibm.team.repository.client.ITeamRepository.ILoginHandler.ILoginInfo;
import com.ibm.team.repository.client.TeamPlatform;
import com.ibm.team.repository.client.internal.TeamRepository;
import com.ibm.team.repository.common.IContributor;
import com.ibm.team.repository.common.IContributorHandle;
import com.ibm.team.repository.common.TeamRepositoryException;
import com.ibm.team.repository.common.model.query.BaseContributorQueryModel.ContributorQueryModel;
import com.ibm.team.repository.common.query.IItemQuery;
import com.ibm.team.repository.common.query.IItemQueryPage;
import com.ibm.team.repository.common.query.ast.IPredicate;
import com.ibm.team.repository.common.service.IQueryService;

/**
 * Uses the ContributorQueryModel to search for a user by the user name 
 * and not the ID.
 * 
 * 
 * Example code, see
 * https://jazz.net/wiki/bin/view/Main/ProgrammaticWorkItemCreation.
 */
public class QueryUserByName {

	private static class LoginHandler implements ILoginHandler, ILoginInfo {

		private String fUserId;
		private String fPassword;

		private LoginHandler(String userId, String password) {
			fUserId = userId;
			fPassword = password;
		}

		public String getUserId() {
			return fUserId;
		}

		public String getPassword() {
			return fPassword;
		}

		public ILoginInfo challenge(ITeamRepository repository) {
			return this;
		}
	}

	public static void main(String[] args) {

		boolean result;
		TeamPlatform.startup();
		try {
			result = run(args);
		} catch (TeamRepositoryException x) {
			x.printStackTrace();
			result = false;
		} finally {
			TeamPlatform.shutdown();
		}

		if (!result)
			System.exit(1);
	}

	private static boolean run(String[] args) throws TeamRepositoryException {

		if (args.length != 4) {
			System.out
					.println("Usage: QueryContributorByName [repositoryURI] [userId] [password] [NameOfUserToSearch]");
			return false;
		}

		IProgressMonitor monitor = new NullProgressMonitor();
		final String repositoryURI = args[0];
		final String userId = args[1];
		final String password = args[2];
		final String findUserByName = args[3];
		ITeamRepository teamRepository = TeamPlatform
				.getTeamRepositoryService().getTeamRepository(repositoryURI);
		teamRepository.registerLoginHandler(new LoginHandler(userId, password));
		teamRepository.login(monitor);

		/***
		 * There is a wide variety of query models available for several domains that allow to query 
		 * the elements and filter the results.
		 *
		 * For some examples on the topic
		 * @see https://jazz.net/wiki/bin/view/Main/QueryDevGuide#ExampleOne
		 * @see https://jazz.net/library/article/1229
		 */

		// Create a query for the ContributorQueryModel
		final IItemQuery query = IItemQuery.FACTORY.newInstance(ContributorQueryModel.ROOT);
		// Create a predicate with a parameter to search for name property  
		final IPredicate predicate = ContributorQueryModel.ROOT.name()._eq(query.newStringArg());
		// Use the predicate as query filter 
		final IItemQuery filtered = (IItemQuery) query.filter(predicate);
		// Get the query service. This is a cast to an internal class. Note TeamRepository and not ITeamRepository is casted.
		final IQueryService qs = ((TeamRepository) teamRepository).getQueryService();
		// Run this ItemQuery. Note, there are also other types of queries qs.queryData(dataQuery, parameters, pageSize)
		final IItemQueryPage page = qs.queryItems(filtered, new Object[] { findUserByName }, 1 /* IQueryService.DATA_QUERY_MAX_PAGE_SIZE */);
		// Get the item handles if any
		final List<?> handles = page.getItemHandles();
		System.out.println("Hits: " + handles.size());
		if (!handles.isEmpty()) {
			System.out.println("Found user.");
			// Resolve and print the information to the contributor object.
			final IContributorHandle handle = (IContributorHandle) handles.get(0);
			IContributor foundContributor = (IContributor) teamRepository.itemManager().fetchCompleteItem(handle, IItemManager.DEFAULT, monitor);
			System.out.println("UUID: " + foundContributor.getItemId());
			System.out.println("ID: " + foundContributor.getUserId());
			System.out.println("Name: " + foundContributor.getName());
			System.out.println("E-Mail: " + foundContributor.getEmailAddress());
			System.out.println("Archived: " + foundContributor.isArchived());
		}			
		teamRepository.logout();
		return true;
	}
}

Additional Examples

Summary

As always I hope this helps someone out there with running RTC. Please keep in mind that this is as usual a collection of very basic examples with no or very limited testing and error handling. Please see the links in the getting started section for more examples, especially if you are just getting started with the RTC APIs.

RTC Process Customization – What you can and cannot do

Rational Team Concert Process Customization – What you can and cannot do, that is the title of the webinar I presented two days ago.

If you are interested in my view on this, you can find the replay of the webinar here in the Rational Team Concert Enlightenment Series.

The slides are shared here.

Also see What API’s are Available for RTC and What Can You Extend? for more links.

Learning To Fly: Getting Started with the RTC Java API’s

I intend this to become the beginners guide for the RTC java API’s. The reason is, I spend far too much time on the forums trying to answer beginner questions on how to get started over and over again. I intend this post to be my link to answer these questions without having to repeat everything all over.

Where to Start?

You first have to understand what API’s are available and what you can extend. If you don’t understand these basics, you can’t decide on how to proceed. It is also a good idea to understand RTC Process Customization and what you can and cannot do.

For more examples have a look at the Jazz Community. If you continue, consider also contributing there.

Setting up Your Development Environment

If you determined you are interested in one of the Java API’s, you need to set up your environment for Java API development. It is extremely important to perform the steps in that post to have an environment, that has the RTC SDK installed as well as the Plain Java Client Libraries. Do the whole workshop even if you just want to use the Plain Java Client Libraries to code up some automation. This familiarizes you with the concepts of plug-ins and give you some first glimpse on the API.

Even if you intent to develop only Plain Java Client Libraries, you should use a plug-in project to develop your code, because that allows to trick the Eclipse Plugin Development Environment (PDE) into showing you the whole source code of the RTC SDK. It requires to set up your environment as explained in Setting up Rational Team Concert for API Development. This requires to run at least the client parts of Lab 1 of the Rational Team Concert Extensions Workshop.

As a benefit this allows you to

  • See the java doc, comments on interfaces, classes and on methods
  • See the code of huge parts of the Plain Java Client Libraries and the RTC SDK
  • Search interfaces, classes and methods even with using an asterisk if you are not sure about the names and packages
  • Search for references to interfaces, classes, methods, extension points to go looking for inspiration and example code

Search The APIGetting started with the RTC Plain Java Client Libraries

To understand how that works read the post Understanding and Using the RTC Java Client API. Especially read the sections

  • Getting Started With Developing for the Plain Java Client Libraries
  • Debugging Client Code and Finding Information about the API
  • Prepare Your Project to Allow Debugging
  • Finding Information About the API

You should carefully read the whole post Understanding and Using the RTC Java Client API, as it explains how the basic mechanisms in the API work. This is also interesting if you intent to write server extensions.

Getting started with Eclipse Client and Server Extensions

If you are not (yet) interested in the content of this section, skip the rest of this section and go to “Where can I find Examples and Example Code?“.

The best place to start is following the Rational Team Concert Extensions Workshop. This provides you with a fully set up environment for debugging and guides you through all the important steps that are necessary to develop client and server extensions. You might also want to look at Bartosz Chrabskis post How to create Rational Team Concert – Advisor & Participant Extension (step by step) and the related video for creating a participant and the video for creating an advisor.

RTC provides a lot of ways to extend the Eclipse based clients and the server. The most important in general are

  • Pre-conditions which are also referred to as Advisors, because they drive the process advisor behavior of operations
  • Follow-up action which are also referred to as participants, because they participate in the process behavior of operations
  • Attribute Customization which are also referred to as providers, because most of them provide values for work item attributes; please  find examples here
  • Components which are used to group extensions

The wiki topic Team Process Developer Guide provides a great overview about what you can do and what the rules are.

On the RTC Server side it is also possible to create asynchronous tasks, that can perform operations such as event generation and mail notification. An example with code and explanation can be found in the post Due Date Notifier – an Asynchronous Task Example.

There are additional extension points available on the client and on the server that can be used. Some examples are

  • Eclipse Client UI Extension points
  • RTC Web UI Extension points

There are still more, that I haven’t even looked at yet.

The most important part is to be able to develop and debug your server extensions using Jetty as explained in the Setting up Rational Team Concert for API Development. If you can’t do that, it is just a waste of time and I would consider not trying it out at all. You also always want to have a dedicated server for extensions development, deployment testing and functional testing.

The code used in advisors and participants is very similar except that the interface used is different and the result that is returned is also different.

Advisors and participants always run in the context of the user that calls the operation. This means they can only access data the user is able to access and perform operations the user is permitted to.

In advisors it is not permitted to modify the element for which the advisor is triggered. In participants this is allowed.

Participants that modify or create elements have to perform an additional save for the objects modified. Please note that this can trigger the same or another participant to be executed. This can result in a server crash, if it causes a recursive descent for a recursion that does not stop. To prevent that, it is possible to pass additional arguments in the save that the sub-sequentially called  participant can use to prevent running into a recursion. See for example this post for how that can be used.

The Extension Points and Operation ID’s to assign advisors and participants to the specific operation to work for can be found here.

In general it is the best approach to extend the RTC Server if at all possible. The reason is that this makes deployment easier. Deployment basically has to only happen on the server and deploying on all the clients can be avoided.

Deploying Extensions

If, and only if, your extension works in the Jetty based development and debug environment, you can deploy it on a real server. If you have not successfully tried your extension on Jetty as explained in the Rational Team Concert Extensions Workshop, it does not make any sense to try deploying it on a test server, let alone on a production server.

The Rational Team Concert Extensions Workshop handles deploying extensions very manual. The post A Custom Condition to Make Attributes Required or Read-Only by Role explains how this can be made more automatic in the section Deploying the Extension.

If the extension works on Jetty, the worst that can go wrong deploying it on a real server is that the dependencies in the extension include libraries that are not available on the server.

Other issues could be missing or not satisfiable dependencies, version issues, missing provision profiles or typos in the profile or corrupt files. This would show in the log file during server start up. Check the RTC Server log (i.e. server/logs/ccm.log).

Please note, a deployment error, a typo in the provision profile or missing or corrupted files in the sites folder can lead to the server crashing / not successfully starting up. The server start up can be interrupted and the server may not be reachable. See the server log for hints what might be the problem.

Please refer to the post Is The Extension Deployed? How Can I Redeploy? for checking if the deployment actually worked and for maintaining and upgrading server extensions.

Client extensions are required if the data that it works with is only available on the client, or if the extension is needed on client and server anyway e.g. for Java based attribute customization provider.

REST APIs

As explained in What API’s are available and what you can extend. There are REST APIS available.

See the Jazz API Landing page for which APIs are available.

These APIS require a HTTP Client to communicate with the server. These APIs can be used from within the plain Java Client Libraries or using other tools. The blog Registering Custom Resource Intensive Scenarios to CLM Applications shows several examples.

Check Using a REST client to authenticate to ELM/CLM Applications and  Give Me A REST for how to get started.

Where can I find Examples and Example Code?

There are countless examples out there, here on Jazz.net, on Stackoverflow and on many other blogs and sites. But apparently this is not enough or too hard to find. So I will try to put guidance on how to get started here.

The SDK

As already explained you can search for code that ships with the RTC SDK. This requires a working development environment as described above and here.

This Blog

You can find examples and example code in this blog. The easiest way to do so is to search the blog. This is really easy. Type the interface, method or any other clue you search for in the search window on the top right section underneath the banner and then use the “Search” button.

Search the BlogThen go through the list of posts that appear.

Most posts have working code attached for download as well.

There is also a page with Interesting Links that I maintain and add stuff that I come across. There are many links to examples for API and other interesting sources.

The Internet

We live in the times of search engines. In the past, like 25 years ago, you had to go to a public library and try to find relevant information or books that most likely were not there. Today you can use your preferred search engine and, with very few effort, find all you can ask for.  It is of course always easier to ask someone else to “Google that for me”, but it is way better to skill up to do it yourself in these Darwin times.

A good approach in this case is to just come up with some keywords, interface or class name and run the search engine on it. In my experience some words what you are looking for and RTC usually is enough. I find the interesting information usually on the first two pages. If not, I try to change and refine my query. Examples for typical search paattern are

  • “create work item java API RTC”
  • “access work item attribute java API RTC”
  • “RTC API IIteration”

If the results on page one are just too many and not promising it is possible – for Google at least – to limit the scope of the search to specific sites.

Using Search EnginesAn example for this pattern would be

  • “create work item java API RTC site:jazz.net”

This is most useful if you know that there has to be something there or recall something was there and you can’t remember where. I find this even more effective than using the search engine available on Jazz.net, because it usually shows the information I am looking for higher in the ranking.

Good sites are

Additional references

Summary

If you want to get started with the RTC Java API’s, work through this blog post and the resources linked to it. I will try to extend this post with more detailed links for specific topics in the future.

As always I hope that helps users out there.

The Work Item Time Tracking API

Recently I was contacted by a colleague about how to work with work item time tracking, available in the Formal Project Management Process. This is an area of the work item API I had not touched so far. So I decided to have a look at it and share the result.

License

The post contains published code, so our lawyers reminded me to state that the code in this post is derived from examples from Jazz.net as well as the RTC SDK. The usage of code from that example source code is governed by this license. Therefore this code is governed by this license. I found a section relevant to source code at the and of the license.

Please also remember, as stated in the disclaimer, that this code comes with the usual lack of promise or guarantee.

On the other hand, you have the code and are able to add your own code to it. It would be nice to know what you did and how, if you do so.

Just Starting With Extending RTC?

If you just get started with extending Rational Team Concert, or create API based automation, start with the post Learning To Fly: Getting Started with the RTC Java API’s and follow the linked resources.

You should be able to use the code attached to this post in the development environment you set up in the Rational Team Concert Extensions Workshop and get your own extensions or automation working there as well.

Download

The code is available for download here.

Work Item Time Tracking

Time Tracking can be enabled in projects based on the Formal Project Management Process. If enabled the user can no longer edit the time spent attribute of work items. Instead the user adds time sheet entries with hours worked on specific time codes on a special tab of the work item editor. The information will be summed up and the total work time will be automatically set in the work item’s time spent attribute.

The image below shows the time tracking data.

Time TrackingTab

The time spent attribute is read-only and calculated from the data above.

Time TrackingTime Spent

In certain circumstances it would be desirable to be able to access the data using the API. The question is, how is the data stored? How can it be read and, most important, how can it be updated using the API?

The Time Tracking API

There is a short explanation in the wiki about how the time tracking API works in general. However, this leaves out some very important details.

Time sheets are stored in RTC as special objects of type ITimeSheetEntry. These objects are associated to the work item they belong to using a special link type using the end point WorkItemEndPoints.WORK_TIME.

It is easy enough to follow the Wiki Entry and create a new time sheet entry.

However, I found out the hard way that it is not as easy to update an ITimeSheetEntry.

The reason is, that the work item API does not detect an update to a time sheet entry alone. So just updating the entry and then saving the work item will not work. The work item API will detect that no change has been done to the work item itself and not perform a save operation. Since the work item save also triggers the save of the dependent work item data, the save for the time sheet entry is also not performed. Adding a new relationship will also not work as you will end up with multiple relationships to the same item.

The only way to update the time sheet data is to force an update to the work item by setting the duration value. This way the API detects that it has to save the work item as well as the time sheet entries as dependent items.

The code I finally ended up with looks like below.

public void updateOrCreateTimeSheetEntry(WorkItemWorkingCopy workingCopy,
		ITimeCode timeCode, Timestamp startDateTimeStamp,
		Duration workDuration, Identifier workType,
		IProgressMonitor monitor) throws TeamRepositoryException {

	// set the active work item from the working copy
	setWorkItem(workingCopy.getWorkItem());

	// Find a matching time sheet if it exists.
	ITimeSheetEntry timeSheet = findTimeSheetEntry(timeCode,
			startDateTimeStamp, monitor);
	if (timeSheet == null) {
		// There is no time sheet for this entry
		// Create a new one and create the link
		timeSheet = createTimeSheet();
		workingCopy.getReferences()
				.add(WorkItemEndPoints.WORK_TIME,
						IReferenceFactory.INSTANCE
								.createReferenceToItem(timeSheet));
		// Add the entry to the map to hold the data
		addEntry(timeSheet, monitor);
	} else {
		// There is a time sheet, we need to update it
		// Get the workingCopy of the time sheet
		timeSheet = (ITimeSheetEntry) timeSheet.getWorkingCopy();
		// remove the time spent from current time
		setTotalDuration(new Duration(getTotalDuration().longValue()
				- timeSheet.getTimeSpent().longValue()));
	}

	// Set the new data
	timeSheet.setStartDate(startDateTimeStamp);
	timeSheet.setTimeCodeId(timeCode.getTimeCodeId());
	// TODO: If I leave this out it fails....
	timeSheet.setTimeCode(timeCode.getTimeCodeLabel());
	timeSheet.setTimeSpent(workDuration);
	timeSheet.setWorkType(workType);
	// add the new time back
	setTotalDuration(getTotalDuration().add(workDuration));
	// Update the value
	// Note: it is important to set the duration value, of the work item
	// otherwise the work item is not marked as dirty and in need to update
	// in the repository and the save process will not save the time sheet
	getWorkItem().setDuration(getTotalDuration().longValue());
	workingCopy.getDependentItems().add(timeSheet);
}

How does the code above work?

First the code tries to find a time sheet entry for the time code and the date that is given.

If it can not find a time sheet entry, a new entry is created and the required reference is also created and added to the work item references. This sets the work item to changed already.

If a time sheet entry can be found, the code gets a working copy that can be modified. The total duration of all the time spent on time sheets is reduced by the amount of time spent on that time sheet (as if the time sheet duration was set to zero).

The data on the tine sheet is then finally set to the current data. In addition the new over all duration is calculated and the result set to the work item’s duration.

Finally the time sheet is added to the work item’s dependent items. Updating the work items duration and adding the time sheet as dependent results in both being saved if the work item is saved.

A few remarks on the code.

  • I did this with RTC 4.0.1
  • For whatever reason the method setTimeCode() is deprecated. However, if I run the code against a 5.0.2 server and don’t use the method, the entry does not show up
  • To create the start date I use SimpleDateFornat and provide the data only down to the year, month and date, this way the entry is automatically created with a timezone and time that works for me
  • The work type is either provided and then used; otherwise the work item type is used as work type

If the start date is created with a wrong timezone and time, the entry might not show up in the UI. To fix that, look at the data used in your repository and change the creation of the start data accordingly.

The TimeTrackingHelper

To make it easier to use the code above, it is part of a class called TimeTrackingHelper. This helper class implements loading existing time sheet entries into a hash map structure that makes searching for the entry easier. The hash map should allow to iteratively use the helper on the same class if required. If the work item changes, the hash map is built up again.

The time tracking helper has code to convert text/string values to the elements needed for a time sheet. It also implements a pattern that allows to iterate the hash map and run an interface on each entry to print the data or do something else with it.

The example below shows how to use the helper in a WorkItemOperation to add a time sheet entry.

// TimeTracking
private static class ModifyTimeTracking extends WorkItemOperation {

	private String fTimeCode = null;
	private String fStartDate = null;
	private String fWorkHours = null;
	private String fWorkType;

	public ModifyTimeTracking(String timeCode, String startDate,
			String workHours, String workType) {
		super("Modify TimeTracking", IWorkItem.FULL_PROFILE);
		this.fTimeCode = timeCode;
		this.fStartDate = startDate;
		this.fWorkHours = workHours;
		this.fWorkType = workType;
	}

	@Override
	protected void execute(WorkItemWorkingCopy workingCopy,
			IProgressMonitor monitor) throws TeamRepositoryException {
		TimeTrackingHelper helper = new TimeTrackingHelper();
		helper.updateTimeTrackingInfo(workingCopy, fTimeCode, fStartDate,
				fWorkHours, fWorkType, monitor);
		helper.printTimeSheets(workingCopy.getWorkItem(), monitor);
	}
}

The interesting part is in the method execute(), where the helper is instantiated first and then used to update (or create) a time sheet.

The code below shows how the helper can be used to just print (or access) the time sheet data.

	int id = new Integer(idString).intValue();

	IWorkItemClient workItemClient = (IWorkItemClient) teamRepository
			.getClientLibrary(IWorkItemClient.class);
	IWorkItem workItem = workItemClient.findWorkItemById(id,
			IWorkItem.FULL_PROFILE, monitor);
	System.out.println("Accessing work item: " + workItem.getId() + ".");
	TimeTrackingHelper helper = new TimeTrackingHelper();
	helper.printTimeSheets(workItem, monitor);
	System.out.println("Accessed work item: " + workItem.getId() + ".");

The code for the TimeTrackingHelper the example class to modify the time tracking data of a work item called ModifyWorkItemTimeTracking as well as the class to just print the data AccessTimeTracking is shipped with the download.

Summary

This post shows how time tracking data is managed using the API. As always I hope this helps someone out there to get their job done more efficient.

Understanding and Using the RTC Java Client API

A lot of users have expressed the need to better understand how to set up and develop against the Plain Java Client Libraries and the client API in general. This post continues my series of best practices around extending and goes deeper into the mysteries of the client API.

There was a nice Jazz.net article posted recently that is also a good source of information about the client API. However, there can never be enough examples, so I think this is useful. Also check the many links to other sources in the Interesting Links page.

As always, our lawyers, reminded me to state that the code in this post is derived from examples from Jazz.net as well as the RTC SDK. The usage of code from that example source code is governed by this license. Therefore this code is governed by this license, which basically means you can use it for internal usage, but not sell. Please also remember, as stated in the disclaimer, that this code comes with the usual lack of promise or guarantee.

Additional RTC Work Item API Examples

See additional links at the end of the article.

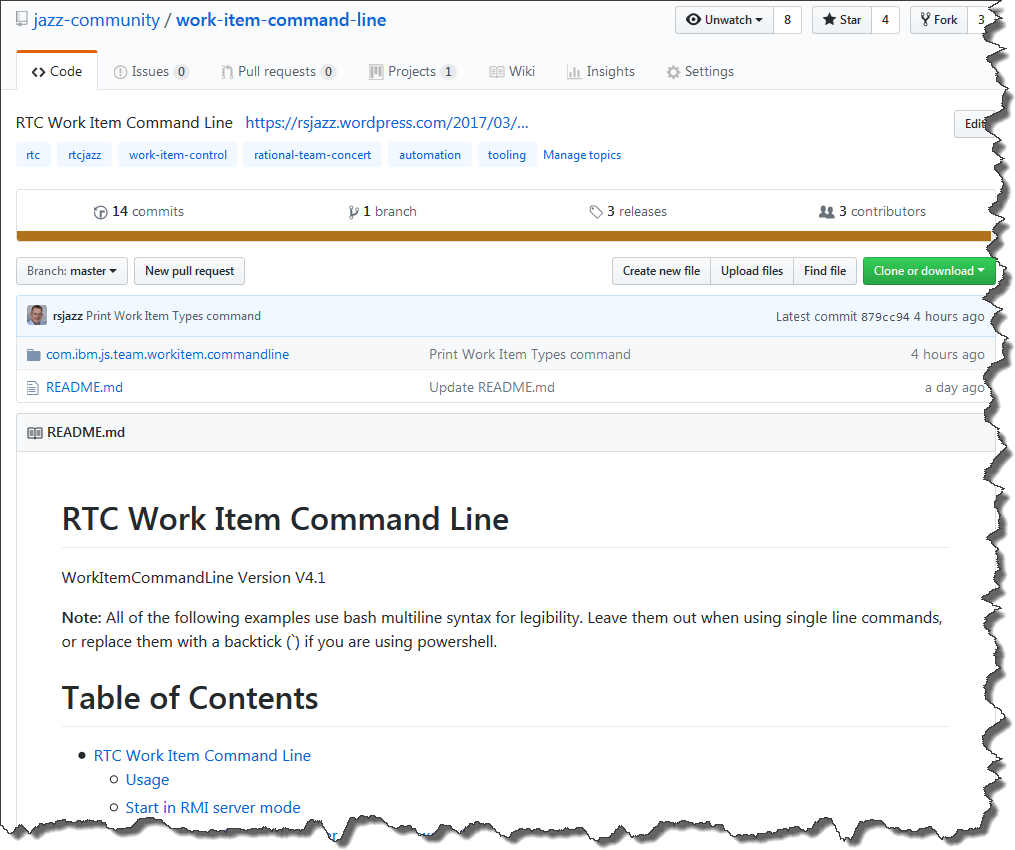
The post A RTC WorkItem Command Line Version 2 contains downloadable code that performs most of the activities required for reading and modifying work items. The interesting code can be found in the com.ibm.js.team.workitem.commandline.helper package in the class WorkItemHelper. All techniques described below are used there. You can familiarize yourself with the concepts in this post and then look into that project for how it is used.

Getting Started With Developing for the Plain Java Client Libraries

If you want to develop for the Plain Java Client Libraries, I would suggest to follow this post and set up your development environment with the SDK and the Plain Java Client Libraries. A complete guidance is in Learning To Fly: Getting Started with the RTC Java API’s and the linked resources.

You should be able to use the following code in this environment and get your own automation or extension working.

Debugging Client Code and Finding Information about the API

It is absolutely critical that you have set up your development environment as described in Setting up Rational Team Concert for API Development. If you have not done that, you are severely limited in what you can see and do. You can not debug your code and therefore will be almost unable to do anything.

Prepare Your Project to Allow Debugging

As described in Setting up Rational Team Concert for API Development in the section Setting Up Your Workspace for Plain Java Development and Make the SDK Source Code Available for the Plain Java Clients Libraries, the Eclipse Plugin Development Environment together with the RTC SDK can help you with developing Plain Java Client Library and Client SDK code.

If you create a new project for new code, create a Plug-In Project as described and add the main plugins that contain the API you want to use. The following dependencies are a good starting point.

DependenciesThe version numbers will depend on your SDK. Keep in mind you really just use the plugin to make searching the API easier by tricking the PDE into believing you want to develop a plug in. Your code will later run as a plain Java class.

In addition to these plug-ins, make sure the PlainJavaApi is in the build path of the project. Add the library to the project. In the package explorer right click the project, select Build Path>Add Libraries… 


AddLibrary

In the wizard select User Library, click Next. Select PlainJavaApi and click Finish.

Select_PlainJava

Make sure the PlainJavaApi library is ordered as described in Setting up Rational Team Concert for API Development in the section Make the SDK Source Code Available for the Plain Java Clients Libraries.

OrderLibaries

Create a main class able to access the API and login

Then you create your main class, that provides the main() method to be called later.

You can just create a Java Class and let the wizard add the main() method for you. I usually use the same package structure I use to name my plugins. E.g com.ibm.js.team. and call my class according to its usage.

I usually start with code that I grabbed from the CreateWorkItem class presented in this Jazz.net wiki page. You can download the example code from the Wiki Page. A typical main() method in a standalone client API tool looks like this code.

public static void main(String[] args) {
    boolean result;
    TeamPlatform.startup();
    try {
        result = run(args);
    } catch (TeamRepositoryException x) {
        x.printStackTrace();
        result = false;
    } finally {
        TeamPlatform.shutdown();
    }
    if (!result)
       System.exit(1);
}

The code starts the TeamPlatforn and if that worked passes the parameters. I usually again use the example code mentioned above and call the run() method passing the arguments for processing. The run method usually starts like the code below:

private static boolean run(String[] args) throws TeamRepositoryException {
	if (args.length != 6) {
		System.out.println("Usage: CreateWorkItemApproval [repositoryURI] [userId] [password] [workItemID] [approverUserID] [approvalName]");
		System.out.println(" [approverUserID] for example 'bob' ");
		System.out.println(" [approvalName] for example 'Code Review' ");
		return false;
	}

	String repositoryURI = args[0];
	String userId = args[1];
	String password = args[2];
	String workItemID = args[3];
	String approverUserID = args[4];
	String approvalName = args[5];

The code gets the required information such as the repository URI, the user id and the password to log in from the arguments. Then it uses this information to log into the repository. Typical code for this looks like below.

	ITeamRepository teamRepository = TeamPlatform
		.getTeamRepositoryService().getTeamRepository(repositoryURI);
	teamRepository.registerLoginHandler(new LoginHandler(userId, password));
	teamRepository.login(monitor);

Once you have successfully logged into the repository, you need the API entry points to actually do something with objects accessible to the API.

The LoginHandler looks as follows:

private static class LoginHandler implements ILoginHandler, ILoginInfo {

	private String fUserId;
	private String fPassword;

	private LoginHandler(String userId, String password) {
		fUserId = userId;
		fPassword = password;
	}

	public String getUserId() {
		return fUserId;
	}

	public String getPassword() {
		return fPassword;
	}

	public ILoginInfo challenge(ITeamRepository repository) {
		return this;
	}
}

Getting Required Client Libraries

You need Client Libraries to access any interesting client API in RTC. In the client API you use the ITeamRepository.getClientLibrary() call to get the client libraries that you need. You can find some examples in the code below. Getting a Client Library uses singletons so the operation should be fast.

	IProcessClientService processClient = (IProcessClientService) teamRepository
			.getClientLibrary(IProcessClientService.class);
	IAuditableClient auditableClient = (IAuditableClient) teamRepository
			.getClientLibrary(IAuditableClient.class);
	IWorkItemClient workItemClient = (IWorkItemClient) teamRepository
			.getClientLibrary(IWorkItemClient.class);

Common API

There is some common API available that can be used in the client and the server. This API usually has “Common” in the name. Examples are IAuditableCommon, IWorkItemCommon, IProcessCommon and some other classes. The namespace or package name always contains “common” as well, for example com.ibm.team.process.common.IProjectArea. It is a good idea to look into these first, because code created with them can be reused on the server as well.

Finding Information About the API

The next question is probably, how do you know which Client Libraries are available and what they are for.

Lets look at what the ones above do first. If you have set up your development environment according to the previous post and got the order of the plugin dependencies and the Plain Java Api library right, you can simply position the mouse pointer over one of the interfaces and browse the information available like below.

BrowseDocumentation

Please note: if you don’t see information, documentation or code while you are following this, make sure that the dependency for the package is added to the plugin.xml as described above. If it is and you still don’t get the source, make sure that the Plug-in Dependencies are above the user Library for the Plain Java Client Libraries PlainJavaApi in the list on the Order and Export tab of the build path as described at the end of the Plain Java Client Libraries section of this post. There are some few classes, where even this might not work, but it is typically nothing you would be interested in seeing anyway.

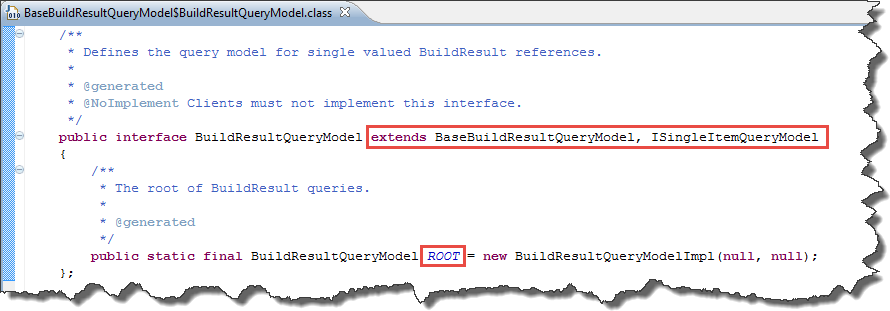
You can focus on the hover to browse more or follow the links. If you are interested in the methods available on the class, you can just point your mouse pointer on the class or interface and open its Declaration as shown below. You can also open the declaration from the hover, if you point to a class, new actions become available at the window.

OpenDeclaration

You can open the Type Hierarchy and even more. If you are interested in how that class or interface is used by the clients, just  browse the references in the Workspace.

BrowseReferencesIf you do this, the PDE searches the SDK for where the class or interface is being used. This will take a moment, so be patient. You are rewarded with a search window that shows locations where whatever you search for is being used.

BrowseTheSearchHitsYou can use the up and down arrow to navigate. The Eclipse Editor will show you the file and the code around the places the class of interest is used.

Try that with the IWorkItemClient. Notice that it extends IWorkItemCommon and open the declaration of IWorkItemCommon. Search for references and browse some of the code. Locate the findWorkItemById() method in the declaration and double click on it. The code and documentation is opened in a Java editor. You can use the same technique to find references as you used before.

Often searching for all the references just provides too many hits. It is easy to narrow down your search. Just select the item of interest such as the findWorkItemById() method and click on the Search menu item in the Main Menu.

BetterSearch
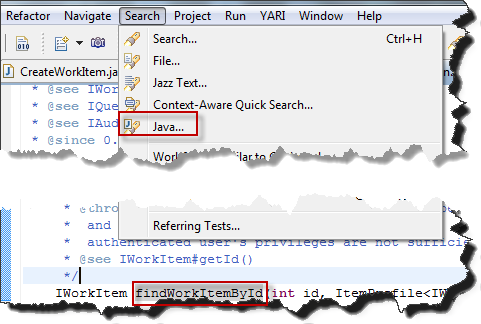
Select the menu item Java…

JavaSearch

You can search for what you are interested in, methods, types, match locations. You can also type some text for example *License, if you are looking for a Type and search the SDK for it. This is interesting if you don’t know what is there, but think it is related to, in this example License management.

If you search for types the match location really comes into play. You can narrow down the search for what you are interested in. As an example mark the parameter type ItemProfile in the method above. Open the search window for Java Search for it (use copy/paste if you want and paste the text into the search field, if you like).

TypeArgumentSearch

Select the Type Arguments for example or anything you are interested to look for, hit OK and search. Now you have way less hits. This way you can find any information about the API that you are interested in.

Finding the Client Libraries

At this point you should be able to answer the question how you can find the available client libraries. Just click on the getClientLibrary() method of ITeamRepository and search for the references and you get many hits that you can easily browse. Build up a list and try to understand the name patterns.

You can also look into the Plain Java Client Libraries JavaDoc for the supported API. If you search the SDK, you will find a lot more client libraries – which you can use, even if they are not supported.

Getting at Data in the API

If you just start with the API, the next issue is how to get at data in the API and how to work with it. The data is not just there, you have to find it based on some criteria and get your hands on it.

Lets assume a simple example. You call your new automation Plain Java Client Library Class and provide the ID of a work item to modify somehow, in addition to the user ID, Password and whatever other information you need to pass it.

Now you need to find the work item based on the ID, which you get as string. The code below shows how that looks like:

IWorkItemClient workItemClient = (IWorkItemClient) teamRepository
	.getClientLibrary(IWorkItemClient.class);

int id = new Integer(idString).intValue();	
IWorkItem workItem = workItemClient.findWorkItemById(id, IWorkItem.FULL_PROFILE, monitor);

What does the code do? First it gets a client library of Type IWorkItemClient that provides a method to find work items by ID.  Then it converts the string with the ID into an integer that can be used to be passed to it. It then calls the find Method and provides additional parameters. Finally it gets the work item.

Different Client Libraries are responsible for different parts of the API. They typically provide methods to locate and find items in the API that are related to their domain. The trick is to find them. Well, consider the previous sections and search for them. You will quickly understand the patterns.

This is pretty typical and actually rather simple code to get at data in the API. It is simple because you often don’t get the real object, but a handle. We will talk about how to work with those handles later.

Item Profiles for Loading

Because the data is stored in a database, you need to use client libraries to retrieve the data. Since the data for things like work items can be of a considerable size and you often don’t need all the data, you provide an ItemProfile for the thing you are trying to load. The ItemProfile determines the properties you are interested in and that need to be retrieved from the persistency layer.

IWorkItem provides several ItemProfiles that determine, which properties are provided for the Item when loaded. IWorkItem.FULL_PROFILE loads everything. If you are only interested in the summary, you might want to limit that. IWorkItem.SMALL_PROFILE only loads the basic properties. You can use several of the provided item profiles. If you look up the code for the item profiles, you can create load profiles yourself.

The code below creates a new ItemProfile for a work item based on the small profile and requests to also load the “Planned For” attribute.

ItemProfile loadProfile = IWorkItem.SMALL_PROFILE.createExtension(
	Arrays.asList(new String[] { IWorkItem.TARGET_PROPERTY }));

IWorkItem also provides a list of definitions for the built in properties (attributes and other things) of a work item.

Not all items provide you with predefined ItemProfiles to load data as easy as workitems do. Sometimes you have to create your own item profile. Any IItem type has a static ITEM_TYPE defined in its interface. You can use that to create an Item Profile. The code below shows how to create an ItemProfile from a type.

ItemProfile.createFullProfile(IProjectArea.ITEM_TYPE)

Expressions and Queries to find WorkItems

You can use queries that are already available or use the API to create expressions to find work items by special criteria.

Progress Monitors

Some API operations are long operations. They require an IProgressMonitor that is used in the UI to show progress to the user (and to cancel operations). In some contexts you are provided with a monitor by the UI. In others like plain Java Client Libraries classes called from the command line you don’t have one. You can typically pass a null, but I find it cleaner to use org.eclipse.core.runtime.NullProgressMonitor instead.

	IProgressMonitor monitor = new NullProgressMonitor();

The Plain Java Client Libraries define a SysoutProgressMonitor you can also use. If you are smart, you hook up a logging library with your own implementation.

Resolving Item Handles

As mentioned above you don’t always get the item, but a handle of type IItemHandle to an item or even a list of handles. The code below is an example.

URI uri = URI.create(projectAreaName.replaceAll(" ", "%20"));
IProjectArea projectArea = (IProjectArea) processClient
	.findProcessArea(uri, null, monitor);
IContributorHandle[] contributors = projectArea.getMembers();

Now you have your handle you need to get at the data. Regardless of what IItemHandle you have retrieved, in the Client API you can typically get the IItemManager implementation from the ITeamRepository class. You can use the IItemManager to resolve or fetch an item. The code below shows an example.

ITeamArea teamArea = (ITeamArea) teamRepository.itemManager()
	.fetchCompleteItem(handle, IItemManager.REFRESH, monitor);

The client API uses caching to optimize speed. You have to tell the ItemManager if you want to resolve using the cached data (if available), or if you explicitly want to refresh the cache, because the item might be modified elsewhere.

IItemManager.DEFAULT and IItemManager.REFRESH are the flags provided that I usually use.

After fetching the Item, you can cast it to the Type you wanted to resolve.

Casting

Regardless whether you read a value or write a value, you usually can’t just use the value. You need to cast the object you get to something you can use. A String, an Int, an enumeration literal, or for more complex itens to an ItemHandle and resolve the handle to be able to access the data.

If you want to set a value, you have to make sure that the Object you pass conforms to the attribute type as well.

It is very typical that you get an object back and have to cast it to something you can use. It is easy enough to use the debugger to find out what the object really is, if in doubt. I usually use instanceof to be sure.

if (workItem.hasCustomAttribute(customString)){
	Object value = workItem.getValue(customString);
	if (value instanceof String) {
		String attributeValue = (String) value;
		// do something with the value
	}
}

ClassCast Exceptions

If your data does not conform to the value that is returned or expected, your code will throw a ClassCastException. Use the debugging capabilities to understand what the Object is that you get back.

Illegal Argument Exception

This usually happens similar to ClassCastException if you pass a wrong class or object to a method. You don’t get a ClassCastException because the code has some built in protection and does not try to blindly cast.

In every case I have seen so far, it was always my fault. Check what type the method wants and try to figure out how to get it. Prominent examples are just passing strings with iteration, timeline, project area, contributor and other objects names. This will not work. In most of the cases you have to use a service or client library to look up these objects by their name or ID or whatever and resolve the result to pass it along.

Get the TeamRepository from an Item

Sometimes you receive IItems and need to understand where they came from, or you just don’t have an ITeamRepository object and need it to do additional work. IItems in the client API provide you with the method getOrigin() that allows you to access the TeamRepository of the Item. The code below shows how that allows you to get at that information.

ITeamRepository repo = (ITeamRepository) teamArea.getOrigin();

Also see the next section how to get the team repository if you only have a UUID.

UUID’s

Internally items in the repository are represented with unique UUID’s. In some cases it is easy to get the UUID. E.g. you can get the UUID from the item handle.

UUID itemUuid = itemHandle.IItemHandle.getItemId();

It is easy to get the teamRepository from the UUID

ITeamRepository repo = TeamPlatform.getTeamRepositoryService().getTeamRepository(itemUuid);

It is also desirable to get the Item from it. The code below helps here:

IItemHandle handle = [itemtype].ITEM_TYPE.createItemHandle(UUID.valueOf(uuid_string), null);

Where [itemtype] is one of the existing IAuditable classes such as IWorkItem, IQueryDescriptor, IBuildResult and so forth. The uuid_string would be the string representing the UUID. Once the handle is retrieved it can be resolved as described above.

This can be done if the type is known. One example is in build automation, where you would have the ID of a build result as text. The example below shows how to get the handle from a string with the UUID.

IBuildResultHandle resultHandle = (IBuildResultHandle) IBuildResult.ITEM_TYPE
			.createItemHandle(UUID.valueOf(buildResultID), null);

You can find the code for the full example here: Automated Build Output Management Using the Plain Java Client Libraries.

Getting the API in an Eclipse Plugin

If you are extending the Eclipse based clients you might be logged in already. So you don’t want to have to login again, but use the user context available.

If you have an IItem for example from a ISelection, you can use getOrigin() as desccribed above to get the TeamRepository.

Otherwise you can just use the TeamPlatform to get an entry to get at data, because it should be available and you should be logged in. The code below shows an example.

	// Find the repositories
	ITeamRepository[] repos = TeamPlatform.getTeamRepositoryService().getTeamRepositories();
	for (ITeamRepository iTeamRepository : repos) {
		String user = iTeamRepository.getUserId();
		System.out.println("User: " + user);
	}

Creating and Modifying Items

Update: See the next topic about a better method for work items.

If you have an item, retrieved as described above, that does not mean you can actually modify it. So far you can only read its data and act upon it. If you want to modify data you might need to get a special object that allows you to modify the item. It is typically called a WorkingCopy. For work items for example, you need a WorkItemWorkingCopy. The code below shows how to get one and how to save the change.

IWorkItemWorkingCopyManager copyManager = workItemClient.getWorkItemWorkingCopyManager();

try {
	copyManager.connect(wi, IWorkItem.FULL_PROFILE, monitor);
	WorkItemWorkingCopy wc = copyManager.getWorkingCopy(wi);

	// TODO: Do something to the work item.

	status = wc.save(monitor);
	if (status.getCode() != org.eclipse.core.runtime.IStatus.OK) {
		return "Error: " + status.getDetails();
	}
} catch (Exception e) {
	return "Unexpected error: " + e.getMessage();
} finally {
	copyManager.disconnect(wi);
}

How do you know if you need a WorkingCopy? There does not seem to be a rule about this. It depends on the part of the API. Try it out, debug it and look for exceptions. If you run into the situation where you seem to be unable to modify the data you want, search the SDK for examples. There are different ways to create modify and save items, dependent on the type. You might have to search the SDK to find a method for the particular object you are dealing with.

Alternative to Create and Modify Work Items

I rarely use a WorkitemWorkingCopyManager these days, instead I wrap my changes to work items into a class implementing com.ibm.team.workitem.client.WorkItemOperation the WorkItemOperation as described in this Wiki page about programmatic work item creation and this and other posts on this blog. I found this the best way to create and modify work items in the client API.

You can use a WorkItemOperation for both creating and updating work items. You pass the parameters to the constructor and override the execute method. If you want to use the operation to update an existing work item make sure to provide an Item Profile in the super() call in the constructor.

The code below modifies a work item and adds an approval.

private static class WorkItemCreateApproval extends WorkItemOperation {

	private String fContributorUserID;
	private String fApprovalName;
	public WorkItemCreateApproval( String contributorUserID, String approvalName) {
		super("Create Approval",IWorkItem.FULL_PROFILE);
		fContributorUserID=contributorUserID;
		fApprovalName=approvalName;
	}

	@Override
	protected void execute(WorkItemWorkingCopy workingCopy,
			IProgressMonitor monitor) throws TeamRepositoryException {
		IWorkItem workItem = workingCopy.getWorkItem();
		// TODO: Do something with the work item here
		ITeamRepository repo = (ITeamRepository)workItem.getOrigin();
            // Find a contributor based on the ID
            IContributor aUser = repo.contributorManager()
                    .fetchContributorByUserId(fContributorUserID, null);
            // Find a contributor based on the login information
            IContributor loggedIn = repo.loggedInContributor();
            ArrayList reviewers = new ArrayList();
            reviewers.add(loggedIn);
            reviewers.add(aUser);

            // Create a new approval and add the approvers
            IApprovals approvals = workItem.getApprovals();
            IApprovalDescriptor descriptor = approvals.createDescriptor(
                    WorkItemApprovals.REVIEW_TYPE.getIdentifier(),
                    fApprovalName);
            for (IContributorHandle reviewer : reviewers) {
                IApproval approval = approvals.createApproval(descriptor,
                        reviewer);
                // Approve @See https://jazz.net/library/article/1118/
                approvals.add(approval);
	}
}

If you use a WorkItemOperation, you can later call the operation like in the code below:

WorkItemCreateApproval operation = new WorkItemCreateApproval(approverUserID, approvalName);
operation.run(workItem, monitor);

The code below creates a work item and sets some values and is basically grabbed from the Wiki page about programmatic work item creation.

private static class WorkItemInitialization extends WorkItemOperation {

	private String fSummary;
	private ICategoryHandle fCategory;

	public WorkItemInitialization(String summary, ICategoryHandle category) {
		super("Initializing Work Item");
		fSummary = summary;
		fCategory = category;
	}

	@Override
	protected void execute(WorkItemWorkingCopy workingCopy,
			IProgressMonitor monitor) throws TeamRepositoryException {
		IWorkItem workItem = workingCopy.getWorkItem();
		workItem.setHTMLSummary(XMLString.createFromPlainText(fSummary));
		workItem.setHTMLDescription(XMLString.createFromPlainText(fSummary));
		workItem.setCategory(fCategory);
			
		List tags = workItem.getTags2();
		tags.add("NewTag");
		workItem.setTags2(tags);
	}
}

The code gets called as shown below

WorkItemInitialization operation = new WorkItemInitialization(summary+" No: "+i, category);
IWorkItemHandle handle = operation.run(workItemType, monitor);

The difference between modifying and creating is in the call to the operation.

  • To modify the work item you pass the item or its handle
  • To create a work item you pass the type of the work item to be created

In both cases you can provide a load profile in the call to super(). If you modify the work item you must provide a load profile.

Working With Work Items Attributes

Please see Working with Work Item Attributes for more examples and how to find even more.

Accessing Work Item Attributes

If you use an Item Profile to load a work item, you typically intent to access its attributes. Please be aware that the work item itself has only very few methods to access the basic data of the work item. To access most of the attributes you need an IAttribute interface first. There are several ways to achieve that. You can look them up if you have the ID.

If you know the work item ID, it is possible to find the work item form the string value.

IWorkItemCommon workItemCommon = (IWorkItemCommon ) fTeamRepository.getClientLibrary(IWorkItemCommon.class);
IAttribute attribute = workItemCommon.findAttribute(projectArea, attributeID,
				getMonitor());
if(attribute != null){
	// Do something with it.
}

Or you can get a list of all the attributes that are built in.

List builtIn = workItemClient.findBuiltInAttributes(projectArea, monitor);

You can get the custom attributes from the work item itself.

List attribs = workitem.getCustomAttributes();

Please be aware it is a good idea to look for the ID’s if you look up attributes, if you do fuzzy matches by name, you might end up using the wrong attribute.

You can find the atribute ID in the Web Project Area Administration UI in work item types and attributes.

WebUI_AttribID2016-04-25_16-41-46

Once you have the IAttribute, you can use that to get the value from the work item. See Working with Work Item Attributes to get more information. You have to cast to the correct types to use the values and when you set values, you have to provide the right types too. Here in the Jazz.net Forum is a nice example that outputs all data of a work item provided as an answer by Sam.

Here one example:

if (workItem.hasCustomAttribute(customString)){
	Object value = workItem.getValue(customString);
	if (value instanceof String) {
		String attributeValue = (String) value;
		// do something with the value
	}
}

Enumerations and some other built in attribute types are a bit special. See the post about working with enumerations, the post about working with iterations and the post about working with work flow states and actions for more details.

WorkItem Data not Based on Attributes

Not all work item data is based on attributes. Most popular are subscriptions, attachments, approvals and Links.

Links between work items are special. See this post with some code that can be used to link work items and other elements. Also see the server link API post for some special cases you want to consider in the client too.

Stale Data Exceptions

I saved a work item and now I have a stale data exception. Why? Well, the reason for that is that someone changed the work item after you resolved it. It is always a good idea to resolve a work item short before you want to do an update. We will see this again in the server API.

ClassCast Exceptions

Regardless whether you read a value or write a value, you usually can’t just use that value. You need to cast the object you get to something you can use. A String, an Int, an enumeration literal, or for more complex itens to an IItemHandle and resolve the handle to be able to access the data.

If you want to set a value, you have to make sure that the Object you pass conforms to the parameter type as well.

If your data does not conform to the value that is returned or expected, your code will throw a ClassCastException.

ImmutableProperty Exceptions

As mentioned above, many objects can not just be changed. You need a WorkingCopy to do so. There are different ways how to get a working copy for different objects.

Null Pointer and Other Exceptions

I get exceptions, the API is broken!

My experience so far is, that it was usually my fault. I didn’t understand the API, failed to resolve another item or made wrong assumptions that led to exceptions. The best approach is to really look into all parameters you pass. Also check if the client libraries you intent to get using the getClientLibraries() really return. One example where you won’t get it that way is the is the IContributorManager, which you don’t get using this call, but using ITeamRepository.getContributorManager(). If you try to get the Client Library it will return null.

Permissions and Read Access

In the last releases more and more API is added to handle read restrictions to items. Make sure that you use the permission aware API like in this blog post or in this Jazz.net article. If you don’t you might have no access to data and even not recognize that this is the fact. See some permission aware API from the Defect178748Snippet.java that ships with the plain Java client libraries below.

private static void processSuspectWorkItems(ArrayList suspectWorkItems, boolean [] hasWarnings, ITeamRepository repo, IProgressMonitor monitor)
       throws TeamRepositoryException {
   IFetchResult result = repo.itemManager().fetchCompleteItemsPermissionAware(suspectWorkItems, IItemManager.DEFAULT, monitor);
   for (Object o : result.getRetrievedItems()) {
       IWorkItem wi = (IWorkItem)o;
       System.out.println("Found suspect workitem " + wi.getId() + ": " + wi.getHTMLSummary().getPlainText());
   }
   if (!result.getNotFoundItems().isEmpty()) {
       hasWarnings[0] = true;
   }
   if (!result.getPermissionDeniedItems().isEmpty()) {
       hasWarnings[1] = true;
   }
}

The permission aware API returns an IFetchResult that allows you to access enough data to decide if you didn’t have access to some items.

List retrieved = result.getRetrievedItems();
List permissionDenied = result.getPermissionDeniedItems();
List missingItems = result.getMissingItems();
List notFoundItems = result.getNotFoundItems();
// Do something with each list.

Operational Behavior, Permissions and Write Access

Please be aware that operational behavior permissions and write access also work in the client API. If you are not allowed to save a work item in a state, because there are required attributes, you will not be able to do so using the API either. So you have to take the permissions and other restrictions into consideration. Potentially you need to create a special role for an automation user, to override preconditions and give the correct permission.

Currently some modification that are only governed by presentations, for example work item editor presentations might be possible with the API and not throw errors. Don’t count on this not going to change.

Debugging and Calling your Code

I find it essential to run and debug the code I write often, especially if I don’t know the area of the API I am dealing with by heart. Since I don’t know any area by heart, I debug early and often 8-). You should do that too.

You should set a break-point into your code at the beginning of an interesting section.

There are some tricks, that can make it easier for you. If you use a main operation like above, you can create a debug configuration and store it in your project along with the client you are writing.

First create a folder called Launches in the project you are developing. This folder will contain your debug and run configurations. You can put it under SCM and share it with others.

Then go into the debugging perspective and open the Debug Configurations editor for example using the Run menu item.

The Debug Configurations editor should come up and allow you to create a configuration like below. Well, yours is probably empty at the beginning.

DebugConfigurationsAdd a new configuration. If you develop a stand alone command line client add a new launch for a Java Application. If you develop an Eclipse Client extension I would encourage you to start with a main method and a java Application Launch too, if at all possible. It saves you to create an Eclipse^2 launch and launching a debug Eclipse every time. You can wrap your code into an extension later. In any case the trick with saving the launch works for all launches.

First configure your project and main class.

Launch_1Next provide the arguments on the Arguments tab.

Launch_2Last step is to go to the Common tab. Select Shared file  and select your Launches folder to store the launch.

Launch_3

Push the Apply button and you saved the launch. Press the Debug button to start debugging.

You can find your Launch as file with the extension .launch in your launches folder. If you forgot to save it that way in the past, you can still change that later, by following the description for the Common tab.

The Launches will show up in the Debug Configuration section as soon as you have a project open with launches. so you can always manage and use your launches on different machines if they are available in their folder in a project. If you Use SCM you will automatically get them with the code for your project.

Run From Command Line

You can run from a command line as described in the README.TXT file you can find in the snippets folder in the Plain Java Client Libraries. What works for me is the command line call as follows:

rem Set JAVA_HOME="C:\IBM\ibm-jdk\"
%JAVA_HOME%/jre/bin/java -Djava.ext.dirs=%JAVA_HOME%/jre/lib/ext;C:/RTC403Dev/installs/PlainJavaAPI -cp ./bin/ com.ibm.js.team.workitem.automation.examples.ModifyWorkItemAddCommentOperation "https://clm.example.com:9443/ccm" "ralph" "ralph" "54" "Add a comment"

This is for Windows and assumes you have JAVA_HOME set and the Plain Java Client Libraries installed at the given location. It also assumes your source code is in a sub folder src/ and the binaries are located in a sub folder bin/ as they are in Eclipse projects. It also assumes the Java code is compiled. Please make sure there is a lib/ext folder available in the JRE.

If you create a jar file call as follows:

rem Set JAVA_HOME="C:\IBM\ibm-jdk\"
%JAVA_HOME%/jre/bin/java -Djava.ext.dirs=%JAVA_HOME%/jre/lib/ext;C:/RTC403Dev/installs/PlainJavaAPI -cp ./lib/;C:/RTC403Dev/installs/PlainJavaAPI -jar ModifyWorkItemAddCommentOperation.jar "https://clm.example.com:9443/ccm" "ralph" "ralph" "54" "Add a comment"

It is easy enough to modify this for Unix like operating systems by replacing ; by : in the -Djava.ext.dirs statement, fixing the usage of the environment variable and the paths.

Have a Test Repository

Did I mention, you should have a test repository to run your tests against? You should in any case test against some local test repository.

Download the Code

Some example code can be downloaded from DropBox. Please note, there might be restrictions to access DropBox and the code in your company or download location.

Related Posts

Performance

Please look at the post Boost Your Automation Performance Using an Automation Server for considerations if you run the automation a lot.

Summary

You should now be up and running for developing Eclipse Client or Plain Java Client Libraries standalone applications. You should know where and how to find the API and have the minimum set of information needed to get started without stalling on the second line of code. As always, I hope this post saves users out there some time – or is at least fun to read.

What API’s are Available for RTC and What Can You Extend?

This post is about what is available as API for RTC. I will try to provide you with some information about the available API’s. It was confusing to me in the beginning, so I assume others face the same problem.

This post assumes you already read the post about Setting up Rational Team Concert for API Development. Learning to Fly contains references to the most important posts for beginners. Please also consider to look into the Interesting Links page for more examples and downloads.You should understand the RTC Process Fundamentals if you want to do any extension or automation.

The post RTC Process Customization – What you can and cannot do is also a great resource to understand the basics.

The first API’s are only mentioned for completeness. They are not covered in this series of posts, but might be in the future.

REST and OSLC APIs

RTC provides some REST API’s that can be used to access and manipulate data. It also provides OSLC based APIs to access some of its data. See Consuming Rational Team Concert’s OSLC Change Management V2 Services to get started. See the Open Services for Lifecycle Collaboration Workshop and Using Perl to access the JAZZ REST API as an entry point. See Lyo OSLC 4J as a potential framework to access OSLC and REST APIs. This blog post provides you with a different browser extension to use for creating REST and OSLC URL’s.

JavaScript API

RTC provides a limited JavaScript API that can be used for Attribute Customization. The JavaScript API is very limited and allows only to access attribute data in the context of the work item the attribute customization runs. See this blog post or go directly to the Process Enactment Workshop for the Rational solution for Collaborative Lifecycle Management 2012 for some examples.

Relevant links

Available Java APIs

There are really two Java API’s available in RTC, and although they have much in common, there are differences that are important to understand if you want to use them. The following API’s are available

  • The Server API that is used in the server part of RTC (and JTS)
  • The Client API that is used by the Eclipse Client and the Plain Java Client Libraries

The server API is used by server extensions. Server extensions must extend com.ibm.team.repository.service.AbstractService. To get other services use com.ibm.team.repository.service.AbstractService.getService(Class) providing a server service class. Note, the server services used must be entered as prerequisite in the server extensions plugin.xml.

The client API is typically retrieved by using com.ibm.team.repository.client.ITeamRepository.getClientLibrary(Class) providing a client service class.

Please see the relevant examples for details.

RTC Server API

The RTC Server API is used in extensions to RTC that are deployed on the server. Examples for these kind of extensions are Operation Advisors, Operation Participants, Server Tasks and other extensions that are run on the server. The RTC Server API is shipped with the RTC SDK that you set up to have an environment for development. This API is typically found in packages called com.ibm.team.*.service and the interfaces are usually named *Service or *Server for example IWorkItemServer.

This blog has several examples for how to extend RTC using the server API. For example

RTC Common API

Parts of the API are available on the client and on the server. The way you get the API depends on if you have a client or a server extension, however, the services are available as client libraries as well as as services. This API is typically found in packages called com.ibm.team.*.common and the interfaces are usually named *Common for example IWorkItemCommon. In some cases the required services are provided by the extension mechanism. This allows to write some extensions that run on the server, as well as on the client. A good example are Attribute Customization providers. You can find examples in these posts

RTC Client API

The RTC Client API is used in Extensions to any of the Eclipse based RTC clients as well as in the RTC Plain Java Client Libraries. This API is typically found in packages called com.ibm.team.*.client and the interfaces are usually named *Client for example IWorkItemClient. The RTC Client API is shipped with the RTC SDK and partially shipped with the Plain Java Client Libraries.

What? The Client API is shipped twice? Why would anyone do that?

RTC Client SDK

The reason for shipping the client API in the RTC SDK and the Plain Java Client Libraries is really simple. You need it in the SDK to develop extensions for the Eclipse based RTC clients. The SDK provides you with the source code and allows to search the code in the Eclipse Plugin Development Environment PDE. Strictly speaking, you would not need the source code to develop the extensions, because the Eclipse client has the relevant parts of the API already installed as plug in’s and that is enough to be able to write extensions. However, it makes development so much easier. The RTC (client) SDK also ships some internal classes and tests that you can use to find examples for the API usage.

Plain Java Client Libraries

If you just want to run a small Java application to do some automation outside of the Eclipse client, you would need only the JAR files for the API, and some JAR files that it depends upon. It would be quite some effort to identify the JAR files in the Eclipse client you need. So the Plain Java Client Libraries  has the required JAR files bundled for you to use. This makes setting up a Plain Java Client application you developed much easier.

The Plain Java Client Libraries ship only the documented and public API. They are missing a lot of RTC Eclipse client specific code.

The post A RTC WorkItem Command Line Version 2 provides an extensive example for using the API to create and modify work items.

Extending Eclipse based Clients

When mentioning you can develop Extensions to the Eclipse based RTC Clients, that was no typo. The Jazz SCM Command Line as well as the Jazz Build Engine and Toolkit are also Eclipse based clients that can be extended. You can find an example for extending the Jazz Build  Toolkit in this post from Robin. The Eclipse Extension mechanism works for all Eclipse based clients.

There are several posts on this blog that talk about the client API. For Example

What is the Difference Between Client And Server API

Although you can often reuse the client API some things are different in the client and the server API so you need to be careful. The Services and Client Libraries have differences in how they are called and what they provide. Creating, getting and manipulating elements is sometimes slightly different in both API’s and you might need data on the server that you don’t have on the client and the other way round.

What can you Extend and Access?

The Server API allows to extend

  • The RTC Server with operational behavior, event handling, jobs and the like.

The Client API allows to extend

  • The Jazz  Build Engine and the Build System Toolkit
  • The SCM Command Line
  • The RTC Eclipse client
  • Potentially any other Eclipse based client

The Client API allows you to access

  • The RTC server and the data in its repository
  • Parts of the JTS server, for example the User and License management

What can’t you extend?

As far as I know you can not extend the Visual Studio Client, nor the Windows Shell, because both are not Eclipse based.

The available Extension Points and Operation ID’s are explained here.

Why is the API Designed the Way it is?

If you start working against the API, you will realize that, from a human perspective, sometimes things appear overly complicated. For example if you work with enumerations, you need to look up all the literals to find one that has the same Label value as your string you want to use to set it.

My personal view on this is, the API is a byproduct of what needed to be developed to design clients and servers. In the client for example, you will typically have views, that need to show more than one element. Or you have drop down boxes to select enumeration values. This just requires to get at all the data such as literals, project areas etc. needed to be displayed in that context. There is just no need to be able to provide a method that takes some string and looks up an item that has a display value that matches that string.

If you want it to be easier, you can always wrap pieces of code up to better fulfill your requirements and reuse that code.

Don’t Mix Client and Server API

You need to be really careful, to understand what client API is and what server API. Client API usually has client in the package name and you get the services with getClientLibrary() calls. Server code usually has server in the package name and you get services using gerService() from the AbstractService type you extend.

There are some packages with common in the package name, and contain common code that can be used on client and server. Still, you would get the common classes using getService() on the Server and the analogous Client Library with getClientLibrary() on the client.

If you mix the Client and the Server API in a server extension, you might find it works in Jetty – because that potentially has the client and the server part available in the SDK. But once you deploy the  extension on the server it will not load because it can’t find the required bundles. The same applies for client extensions.

The next post will go into the details of the client API.